10 Rhegmatogenous Retinal Detachment – Vitrectomy
10.1 Vitrectomy Repair
Pars plana vitrectomy (PPV) has become increasingly popular for the management of rhegmatogenous retinal detachment and has – in many places – replaced buckle surgery as the predominant treatment approach. The development of smaller gauge instruments, improvement in surgical machinery, steeper learning curve, less ocular comorbidities, and high standardization make PPV attractive as initial approach.
In general, Microincision Vitrectomy Surgery (MIVS) (23-, 25-, or 27-gauge) is preferred for retinal detachments, particularly because the port cannulae minimize the chance of retinal incarceration at the sclerostomies. Development of stiffer instruments and constant improvements of intraocular MIVS tools allow for the management of complex situations such as proliferative vitreoretinopathy (PVR) membrane removal, removal of retained lens fragments or management of intraocular foreign bodies.
Consider the location of the retinal detachment prior to making the sclerostomies to avoid inadvertent sub-retinal entry. The trocars are usually placed in the inferotemporal superotemporal and superonasal positions. When inserting the trocars one should visualize the intraocular opening of the trocar to ensure that trocars are actually within the vitreous cavity and not underneath detached retina or even in the suprachoroidal space – a problem to be considered in hypotonous eyes or eyes with choroidal detachment or proliferative vitreoretinopathy.
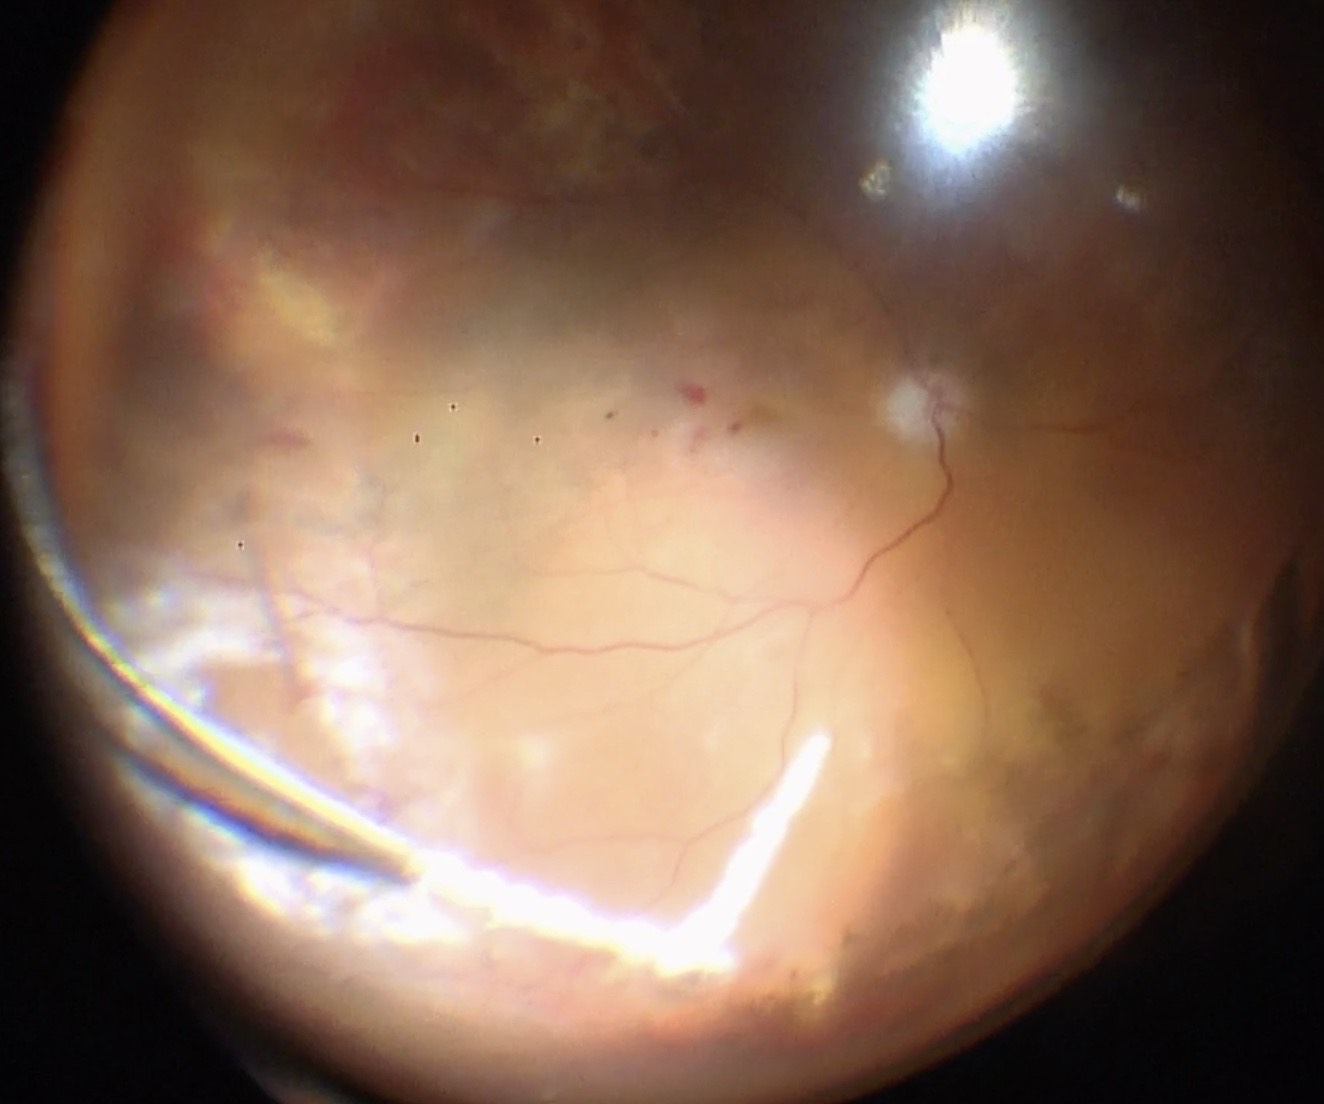
Before starting the vitrectomy, the surgeon should visualize the full extent of the retinal detachment (Figure 10.1.1) and the location of the tears (Figure 10.1.2). Also, the amount of PVR and sub-retinal bands should be identified. Close attention should be paid to small breaks close to the ora serrata, more commonly observed in pseudophakic patients.
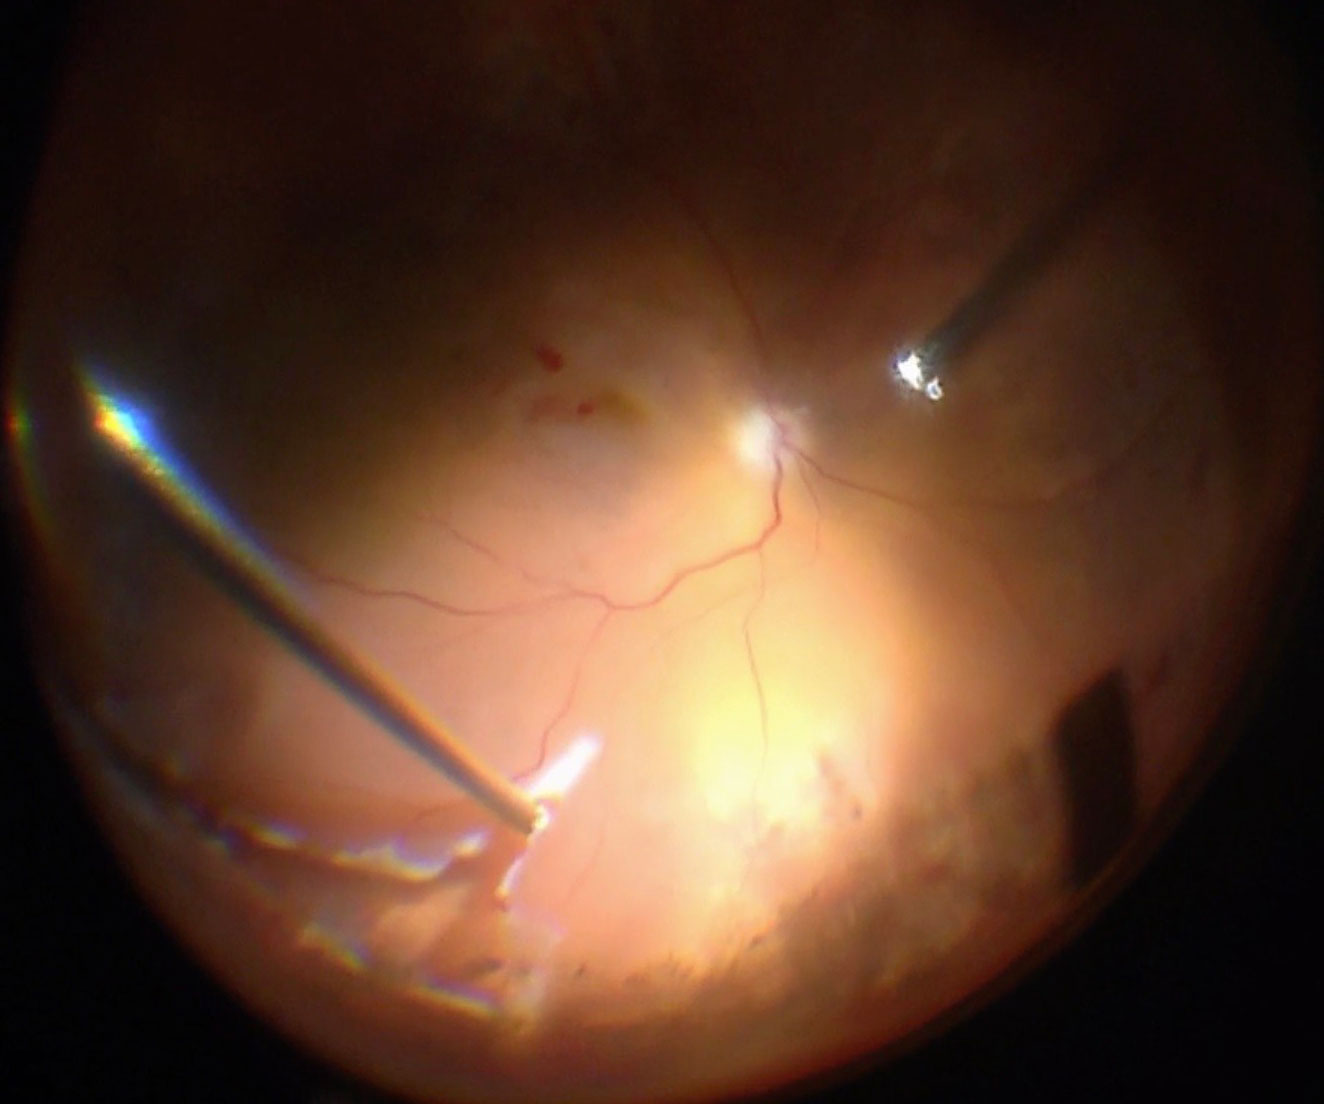
Apart from removing the bulk of the vitreous, close attention should be paid to clean the areas around the inner openings of the trocars, so no vitreous becomes incarcerated (Figure 10.1.3). The next critical step is to ensure that a posterior vitreous detachment (PVD) is present (Figure 10.1.4). In most cases of retinal detachments, a PVD is already present. In those cases where no PVD is present, it should be induced. It might be difficult to visualize the posterior hyaloid membrane. In these cases, an intravitreal injection of triamcinolone acetonide is often helpful to visualize the remaining vitreous and the presence of a still attached posterior hyaloid. Special care has to be taken in cases where a posterior vitreoschisis is present. In those situations, it might seem that a PVD is already present, whereas in fact a very thin layer is still adherent to the retina.
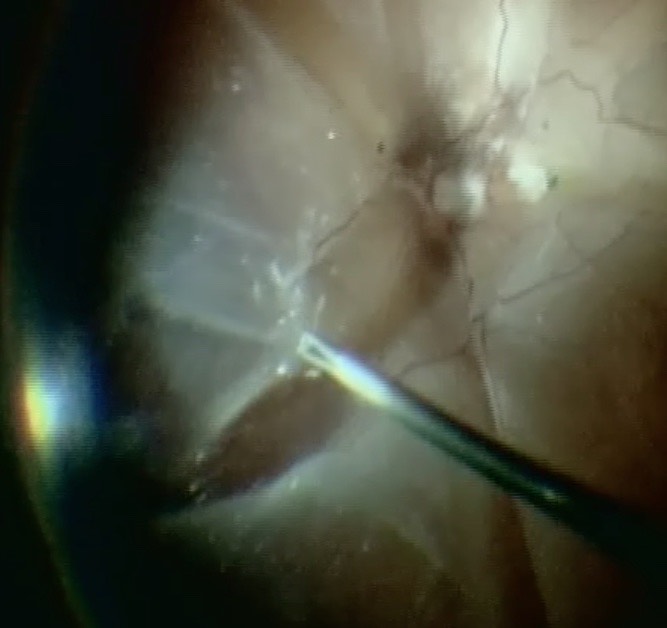
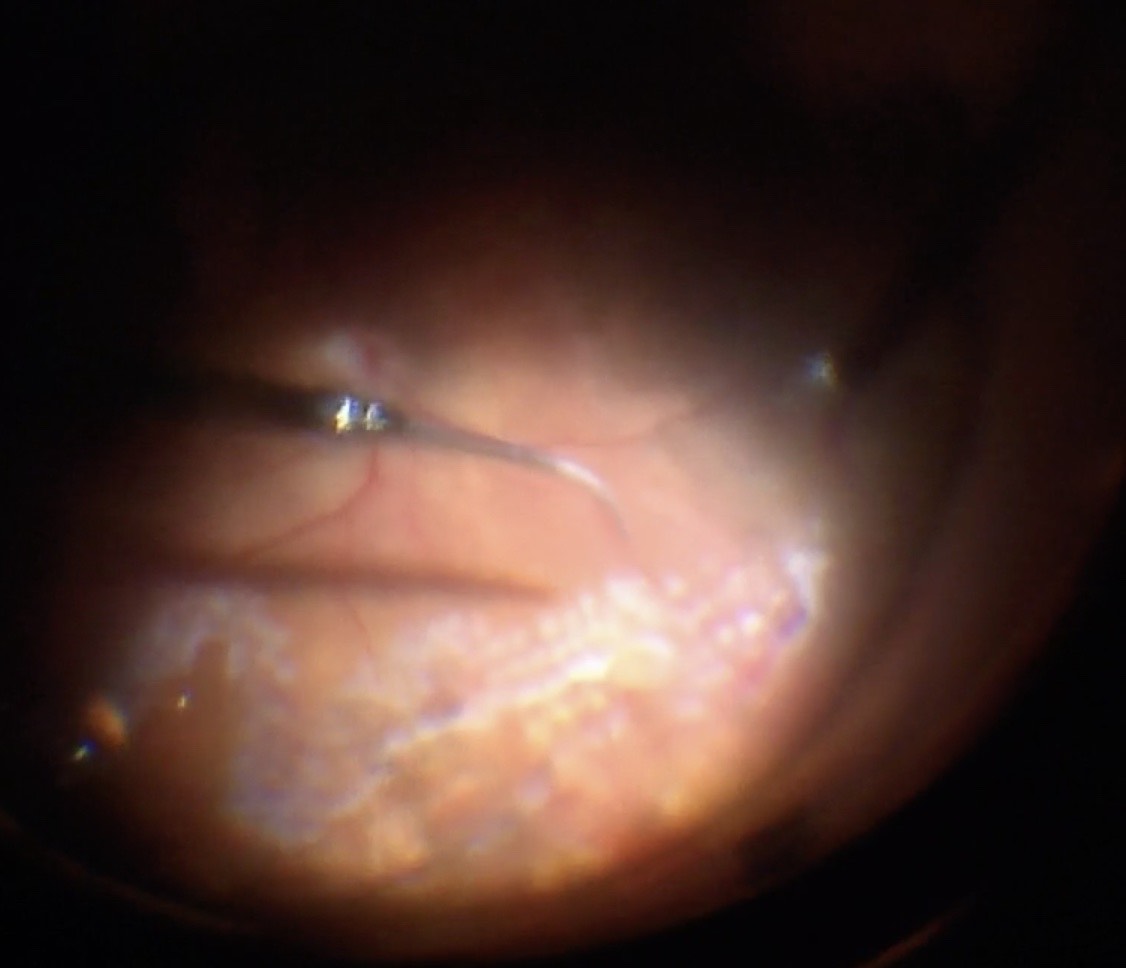
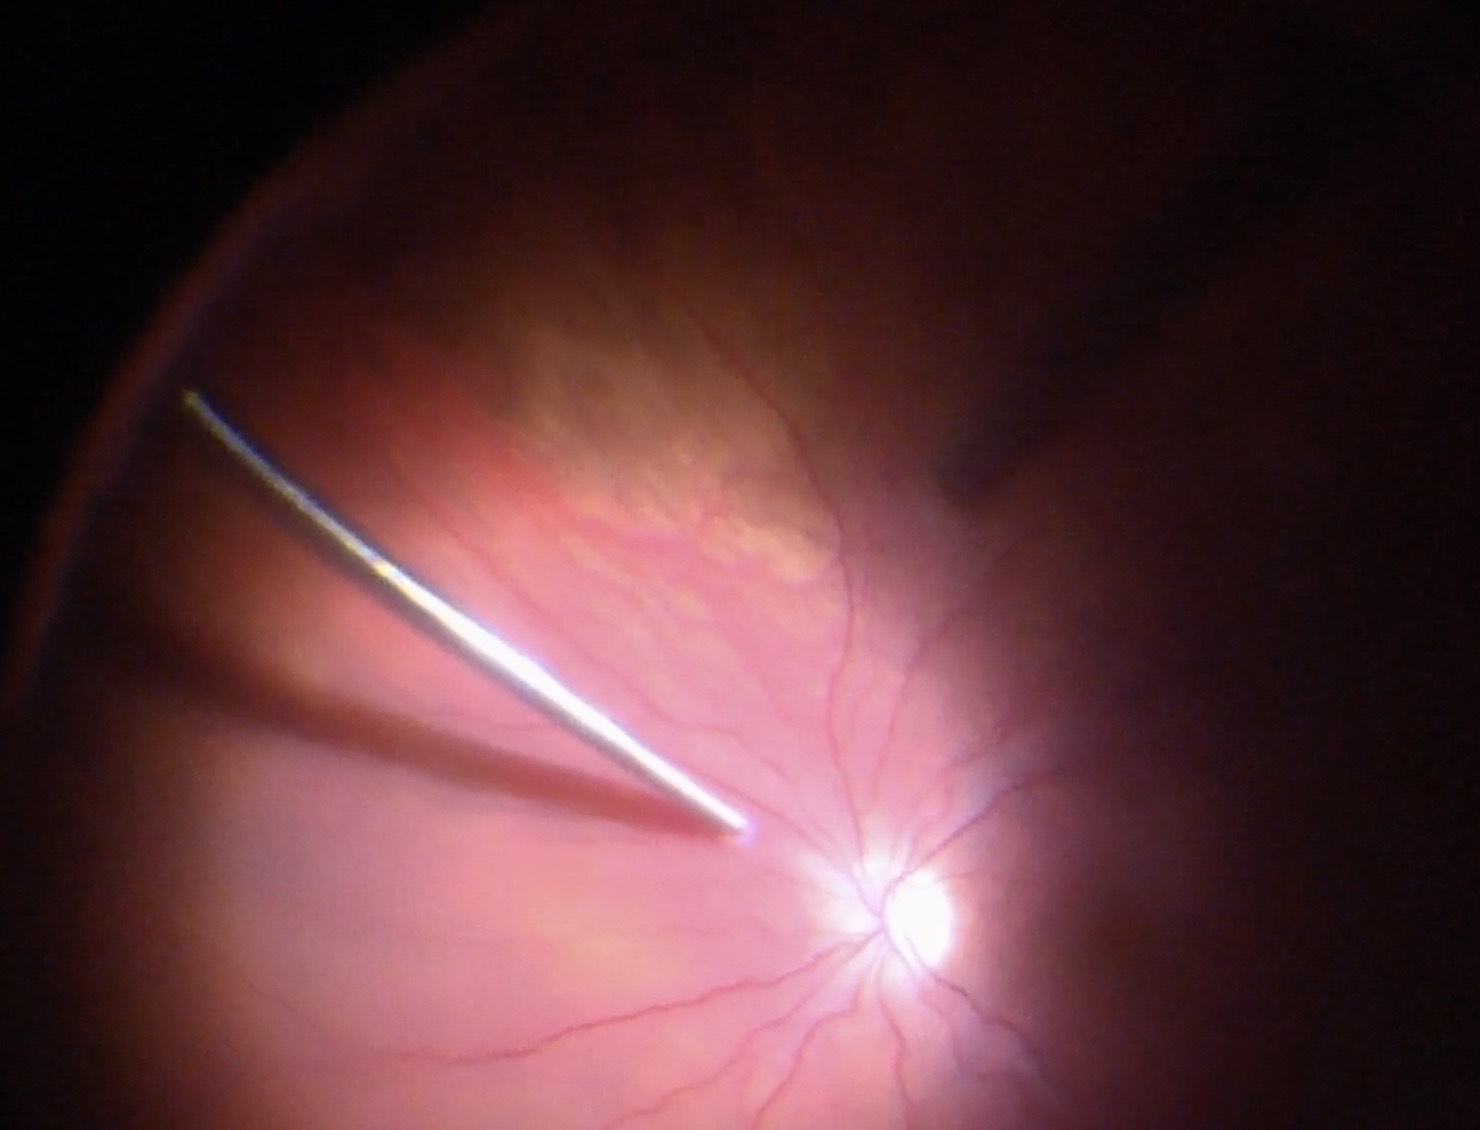
Make sure that all of the vitreous is removed, particularly around the tears (Figure 10.1.5) and the vitreous base. In cases where the retina is largely detached and mobile, care has to be taken not to cut the retinal tissue with the vitrector. There are a number of options to stabilize the retina or to reduce movement. It is possible to place the cutter over the break to drain some of the subretinal fluid, making sure that the cutting opening is not pointing towards the direction of the retina. In some cases where the detached retina is very mobile and it is difficult to get close to the break, shielding the retina with the light pipe is also a possibility. Some surgeons prefer to cut or trim the flap of the break in order facilitate the drainage of subretinal fluid. If you consider such maneuvers, make sure that you are not cutting bridging vessels, as this can cause a vitreous hemorrhage. If there are vessels crossing the break, use endodiathermy to coagulate the vessels to reduce the risk of bleeding.
Another option to stabilize the retina is scleral depression (Figure 10.1.6). This usually requires the presence of an assistant, although it can be done by the surgeon if using an illuminated scleral depressor. External drainage under direct visualization may also allow for stabilization of the retina. In these cases, begin by external needle draining inferiorly or nasally while the infusion is already placed. Then perform vitrectomy shaving over the break last, leaving a cap of vitreous over it so that vitrectomy on intact retina can be performed without irrigating infusion fluid moving into the break and elevating the retina again. A final option is to use heavy liquids such as perfluoro-n-octane (PFO). Where available, PFO helps to drain subretinal fluid very quickly and stabilize the retina so the vitrectomy can be performed more efficiently. When using heavy liquids, one has to make sure that it is not injected underneath the retina (it causes atrophy of the retina and the retinal pigment epithelium) and that the fluid is injected slowly so that there is a single large heavy liquid bubble within the vitreous cavity flattening the retina. Multiple small bubbles are more likely to migrate subretinally. One should also make sure not to trap hyaloid under the PFO and that an adequate PVD has been induced prior to injection. Finally, if performing depressed shaving with PFO in the eye, take care to depress on and off the eye slowly to avoid inducing turbulence and “fish eggs” bubbles.
An important step is the meticulous shaving of the vitreous base. This is usually done by indenting the vitreous base so that it is within the optical axis and is visualized well. Trimming the vitreous as much as possible should be the goal. When working along the vitreous base, one has to make sure, specifically in phakic patients, that no lens touch occurs. The indentation can either be done by an assistant or if the surgeon is operating alone, using the light pipe. During vitreous base shaving, make sure to visualize the anterior and posterior insertions of the base and trim along those boundaries.
In cases where a very dense cataract is present, a cataract surgery prior to vitrectomy may be considered in order to maintain a separation between the posterior and anterior segment and to allow for an adequate visualization of the posterior segment. The cataract surgery can usually be performed in the standard fashion, an IOL is placed into the capsular bag and then the vitrectomy can follow.
Particularly in older detachments where a shortening of the retinal tissue is already present and PVR developed to a great extent, the placement of an encircling buckle is an option one may consider. Alternatively, a retinectomy of the shortened retinal tissue is performed. If possible, a buckle should be placed especially when there is extensive shortening as it may help to stabilize the retina better - moreover, a retinectomy can further induce PVR development, so placing a buckle may function to support the horns of the retinectomy as well as intact and attached retina.
In the uncommon circumstance that a retinal detachment is not associated with a posterior vitreous detachment (such as may occur with highly myopic patients), the posterior hyaloid must be iatrogenically elevated. This may be achieved by:
- The vitreous cutter (usually at the optic disc) or with microforceps.
- Under a flat lens (A) or wide-angle viewing lens (B). The addition of intravitreal triamcinolone to stain the posterior hyaloid is often very helpful.
If there is significant proliferative vitreoretinopathy (PVR), determine if it is sub-, intra- or epi-retinal. Epi-retinal and sub-retinal PVR can be removed by peeling, but intra-retinal PVR can only be removed with retinectomy. The aim of any maneuver should be to release the traction PVR exerts on the retina. Whenever there is still traction and the retina is not attached, the risk of further PVR development is high.
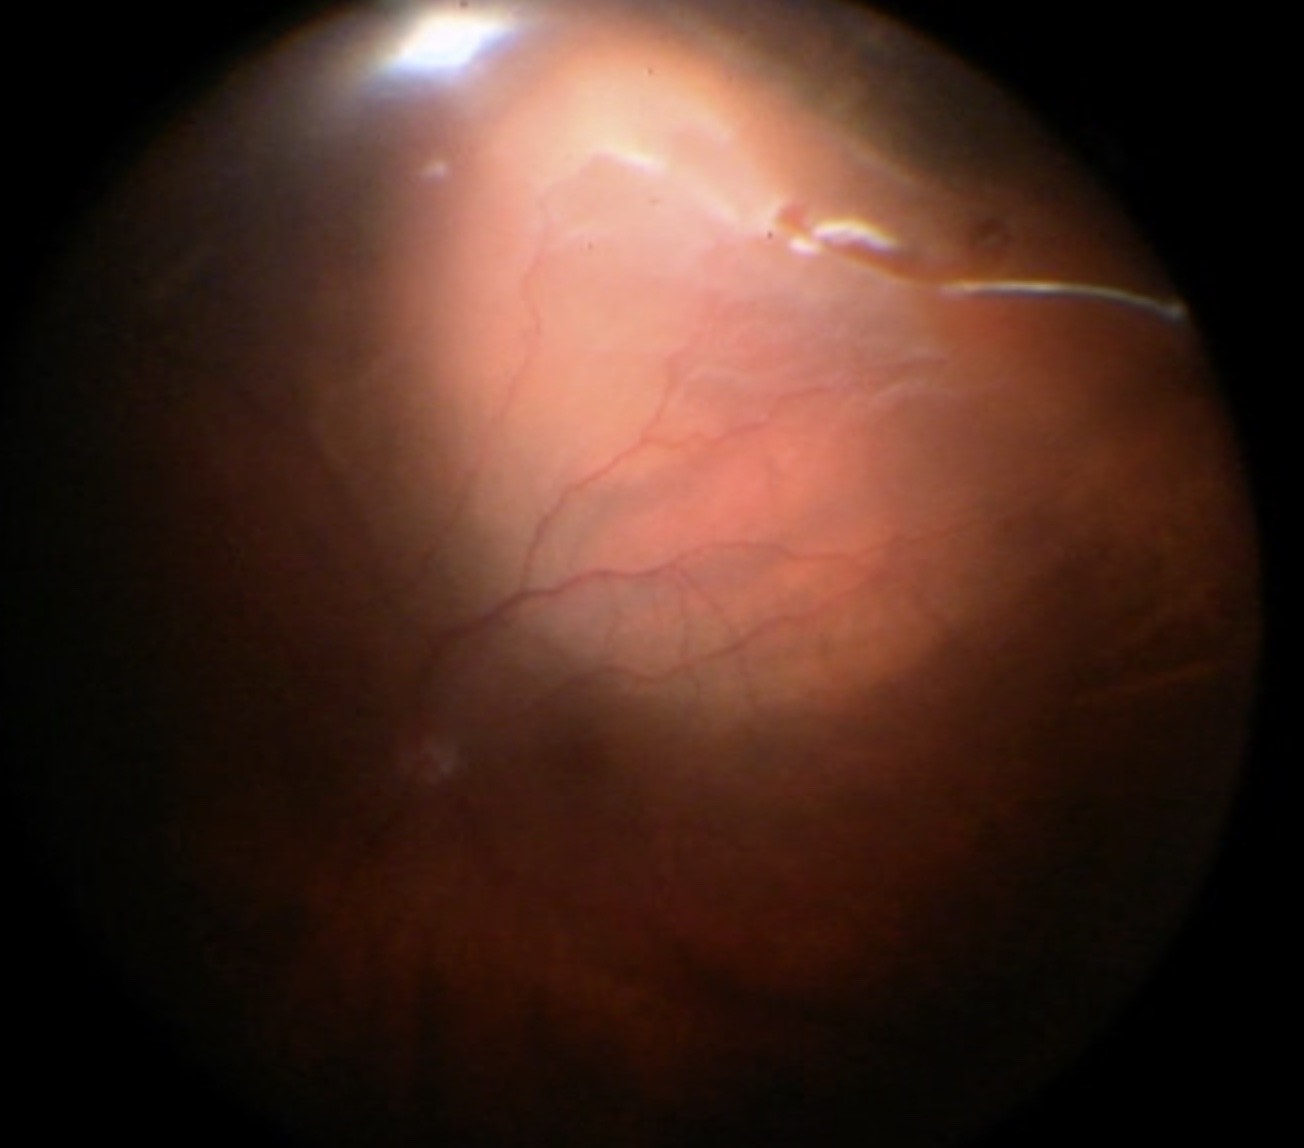
A. Epi-retinal PVR (Figure 10.1.7)
Epi-retinal PVR is difficult to remove because the retina is detached- attempts to pull on the membrane lifts the retina further. Techniques that can be used to remove the epi- retinal PVR include:
- Staining the membrane (e.g. Brilliant Blue G, Indocyanine Green, or Trypan).[1] However, some surgeons feel that these stains do not work well on PVR membranes
- Lifting an edge of the membrane with a 25-gauge needle pick or MVR blade pick under a flat lens (bend the tip of the needle or MVR blade with a needle holder / driver)
- Peeling the membrane with end-closing micro-forceps (or aspirating with the cutter) under a flat lens. Special forceps are designed for this purpose
- Use of a lighted pick or chandelier illumination to allow for bi-manual surgery
- If the membranes cannot be peeled because the retina is too mobile, perfluoro-n- octane can be injected into the intravitreal cavity to flatten the retina and act as a “third surgical hand”. This immobilizes the posterior retina, making it easier to peel the anterior retina. It is difficult to peel membranes directly under PFO
Feron E. et al. Trypan Blue Staining of Epiretinal Membranes in Proliferative Vitreoretinopathy. Arch Ophthalmol 2002; 120:141-144.
Subretinal bands can be removed with micro-forceps. Not all subretinal bands require removal- decide whether this is required to flatten the retina. If unsure, a fluid-air exchange can be performed to determine this. Subretinal bands may be removed with micro-forceps through a break. If they are distant from a break, perform a retinotomy (apply endodiathermy then open the retinotomy with the vitrector cutter) to access the band. It is often best to locate this at the centre of the band. Using micro-forceps, pull the band tangential to the retina until it exits from the sub-retinal space, taking care not to break it. The retinotomy can double as a site for drainage of sub-retinal fluid, so either a posterior or anterior (where it can lie on a sclera buckle) position is preferred.
Figure 10.1.7 Peeling Epiretinal PVR Membranes
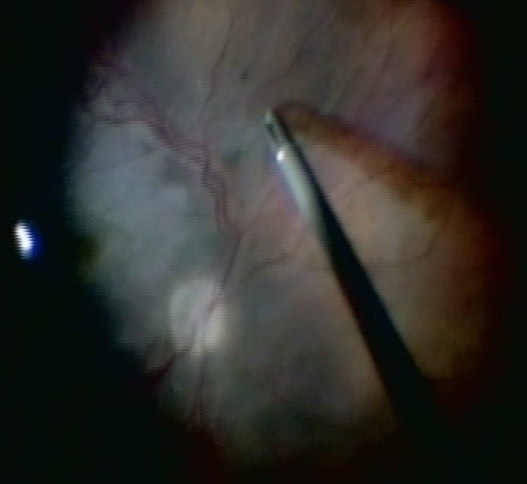
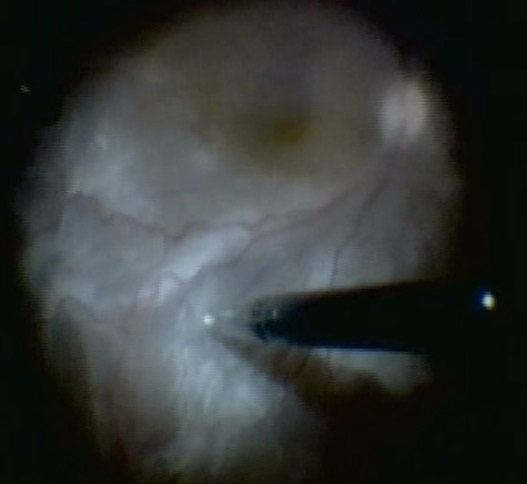
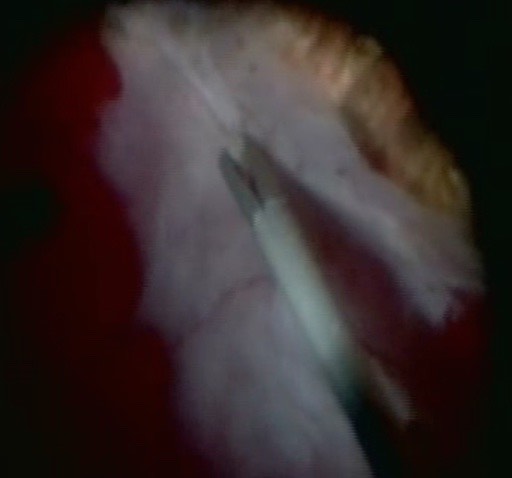
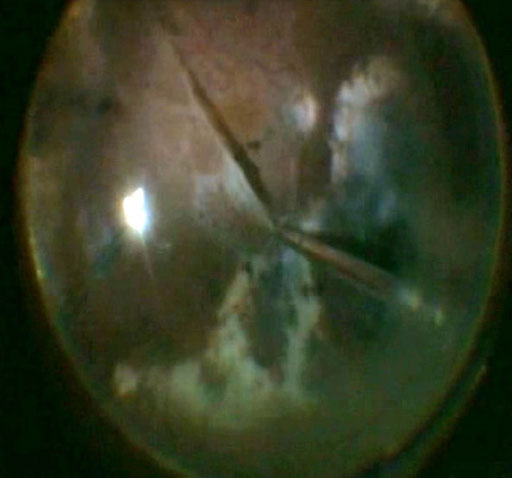
Figure 10.1.7 Peeling Epiretinal PVR Membranes
Retinectomy
In the event of severe (Grade C or D) intra-retinal PVR, a retinectomy may be required. Once attempts have been made to peel PVR membranes, the retina should be assessed to determine if it will flatten after a fluid-air exchange. Using the back (blunt) end of the cutter, gently “feel” the retina to see if it is mobile enough to flatten. If not, a retinectomy may be required where the retina is too “stiff”. Another sign of persistent traction under PFO is the bubble forming an oval rather than a spherical configuration. Any retinectomy should be generous enough to enable flattening of the retina- it may induce PVR itself by liberating retinal pigment epithelial cells so it is essential that it is adequate if performed. Remove any retinal cysts. The aim is to relieve any traction so that the retina stays nicely attached under air before insertion of a tamponade.
In order to perform a retinectomy (Figure 10.1.8), identify where most of the traction is. Use an endodiathermy to draw a demarcation line where the retinectomy is to be performed. The diathermy will help to soften the tissue and avoid bleeding in case you cut retinal vessels. The intraocular pressure may also be increased during this step to avoid bleeding. Once diathermy has been performed, use the vitrector to cut the retina. If there is sufficient release of traction, the retina should flatten and reattach to the retinal pigment epithelium-particularly when heavy liquid is used. As a next step, make sure to remove all anterior retina in order to avoid the formation of anterior fibrous bands that could lead to a detachment of the ciliary body, hypotony, or neovascular glaucoma. The shape of the retinectomy may vary based on surgeon preference. Some surgeons prefer 180 degree retinectomy if any retinectomy is performed at all. 270 or 360 degree retinectomies often lack long term stability. Other surgeons prefer to wedge out a small area of contracted retina. Wedge retinectomies may be performed on anterior foreshortened retina or also on posterior starfolds if they fail to relax with membrane peeling. The horns of the retinectomy should be adequately vitrectomized and relaxed as they are ripe areas for post-operative contraction.
Figure 10.1.8 Retinectomy
A retinectomy may be required if the retina won’t flatten despite maximal peeling of proliferative vitreoretinopathy membranes. Any retinectomy should be generous enough to enable flattening of the retina. Endodiathermy is applied in the line of the retinectomy (A), which is then opened with the vitrector cutter (B). The anterior flap of retina is removed with the vitreous cutter. The posterior edge of the cut retina is lasered (C).
A
B
C
Figure 10.1.8 Retinectomy
A retinectomy may be required if the retina won’t flatten despite maximal peeling of proliferative vitreoretinopathy membranes. Any retinectomy should be generous enough to enable flattening of the retina. Endodiathermy is applied in the line of the retinectomy (A), which is then opened with the vitrector cutter (B). The anterior flap of retina is removed with the vitreous cutter. The posterior edge of the cut retina is lasered (C).
Endodiathermy to Edge of Tears
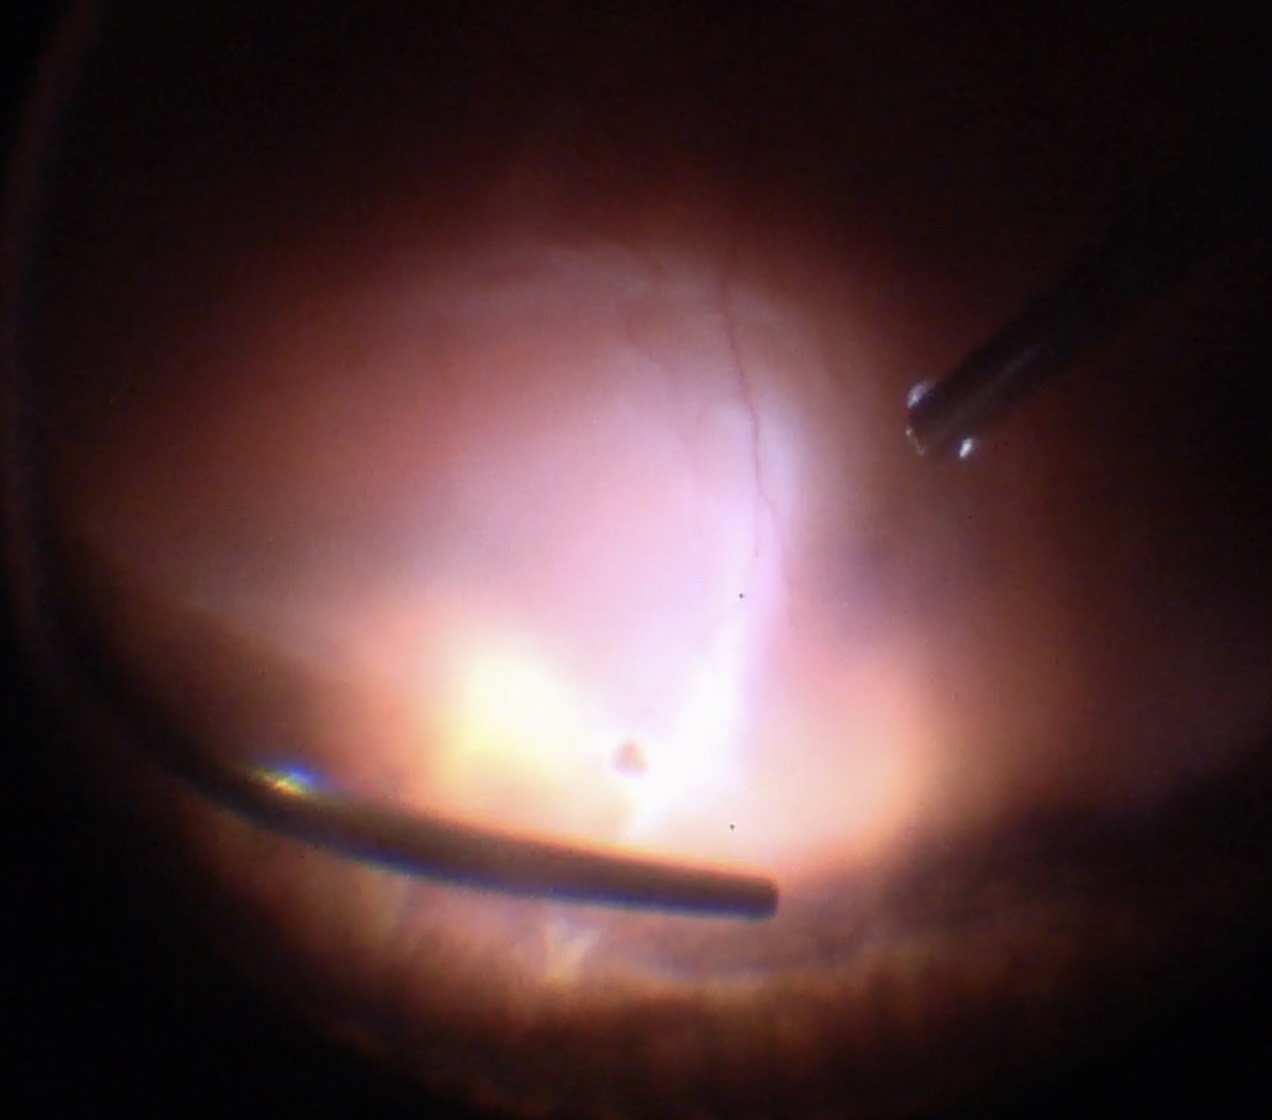
Endodiathermy can be applied around the edge of tears to allow for their identification under air (Figure 10.1.9). It also reduces the risk of intravitreal hemorrhage. Some surgeons believe that this maneuver may minimize the risk of PVR development. However, there is no evidence that this is the case and application of this technique varies greatly from centre to centre. Another option for marking tears is to use endolaser on a high setting.
Whenever possible, attempts should be made to drain subretinal fluid through the break(s). If the break is posterior, subretinal fluid may be drained from its posterior edge as a fluid-air exchange is performed. This can also be achieved with more anterior breaks by rotating the eye such the break is positioned most inferiorly (where fluid will gravitate). Despite this, in some cases the break will be too anterior, and attempts to proceed immediately to a fluid-air exchange will result in persistent subretinal fluid. This is particularly dangerous if the retinal detachment is just macular-on as subretinal fluid may be pushed underneath the macula. With large retinal detachments (typically superior bullous) there is also the risk of retinal folds which can usually be visualized while under air. One way to improve the efficiency of drainage under the break is to begin by draining under fluid. This allows for better evacuation of thick subretinal fluid (Schlieren effect) which may be hard to remove or become trapped under air. However, many cases cannot be effectively drained from the causative break. If this is the case, subretinal fluid will need to be drained by either one of the two following methods:
A. Perforo-n-octaine (PFO, “Heavy liquid”) Technique (Figure 10.1.10)
Perfluoro-n-octane (PFO) is a perfluorocarbon liquid (PFCL) with a high density and specific gravity. The use of PFO to flatten the retina has the advantages of avoiding an iatrogenic break (posterior retinotomy), and of protecting the macula (this is particularly important if the detachment is macular-on). Posterior retinotomies may be associated with visual field defects and PVR re-detachments. The disadvantages are the cost of PFO and risk of retained (especially sub-retinal) PFO.
With current instrumentation, PFO can be injected through small gauge cannulae. First, lower the intraocular pressure. The PFO can be injected through a regular cannula or through a dual bore cannula which allows for simultaneous efflux of BSS. The injecting cannula may also be connected to the syringe by high pressure tubing. This allows the surgeon to hold the cannula directly rather than the syringe which is large and bulky and may present challenges for surgeons with small hands. It is important to make sure that there is no vitreous adjacent to the inner opening of the infusion cannula, so that BSS can flow backwards through the infusion cannula to maintain intraocular pressure within the set range. Some infusion cannulas won’t allow for such backflow. In this situation, if injecting directly through a valved cannula, the valve on the opposite cannnula may need to be intermittently released to avoid an increase in intraocular pressure.
When injecting heavy liquids, do it slowly and maintain the injection cannula within the growing bubble so that one single large bubble is created rather than separate small bubbles. If there is one big bubble, the risk of heavy liquid migrating underneath the retina is reduced, even in cases where large retinectomies are performed. Also be careful of crossing large breaks with the PFO canula without applying negative pressure as PFO may drip out and into a break. After heavy liquid is injected, perform maneuvers such as indentation of the vitreous base slowly in order to avoid rapid changes in flow from the infusion line that tends to create small bubbles of PFO. Subretinal fluid will only be easily displaced by heavy liquids if the subretinal fluid is of low viscosity, i.e. in a rather “fresh” detachment. In retinal detachments that are older, where the sub-retinal fluid has a gel -like consistency, heavy liquids may not move those sub-retinal accumulations of liquid. In those cases, active extrusion of the dense subretinal fluid through a break or posterior retinotomy may be required. This can be done before or after insertion of the PFO with a backflush or soft tip extrusion cannula.
Once the retina is attached using heavy liquid and all sub-retinal fluid has been drained, both BSS® and heavy liquid can be removed in a fluid-air exchange. Note: there are two general options when draining with PFO. The PFO can be brought up to the most posterior break then fluid air-exchange performed at that location followed by laser under air, or the PFO can be brought to the ora serrata (consider this when breaks are very anterior), then laser can be performed under PFO followed by fluid-air exchange at the anterior break.
When draining, the backflush or soft tip extrusion cannula should be positioned close to the posterior edge of a tear so that any remaining sub-retinal fluid drains through the break while heavy liquid keeps the retina in place. If PFO is removed too soon and its meniscus lies below the break, it will not be possible to remove the remaining subretinal fluid, which will migrate posteriorly. If this occurs either inject more PFO (back up to the posterior edge of the most anterior break) or tilt the eye to achieve the same effect. Once all the subretinal fluid and BSS® have been removed, only air and PFO remain. The loss of the PFO-BSS® interface breaks the surface tension of the PFO, so that it is no longer seen as a “bubble”. Once the subretinal fluid is drained and the BSS is drained as well, the PFO should be completely removed. Some surgeons use a small cannula to add some drops of BSS onto the retina surface after removing heavy liquids, to verify that all the PFO has been removed. Care must be taken to meticulously remove as much of this as possible, as it is toxic to the retina when left long-term and chronic inflammation of the eye can ensue. PFO is more forgiving when using a gas tamponade as residual PFO left behind may evaporate at the gas interface. In contrast, when using an oil tamponade, retained PFO will usually stay behind in the vitreous cavity.
Figure 10.1.10 Perfluoro-n-octane (PFO)
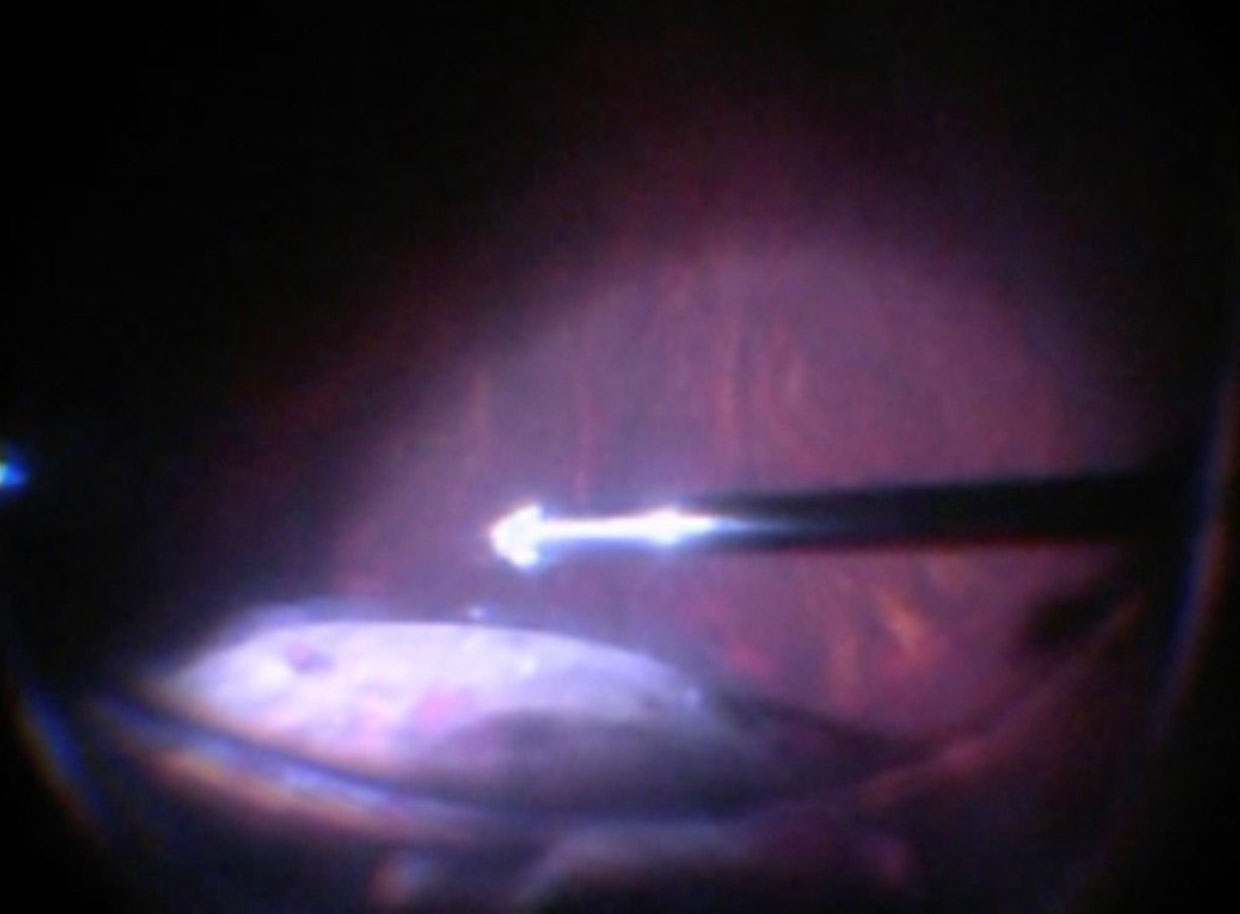
A: Injecting PFO. Direct the tip of the cannula towards the optic disc. Ensure that the tip of the cannula stays within the growing PFO bubble
B: “Ballooning up” of the peripheral retina when PFO is injected suggests the absence of a peripheral break.
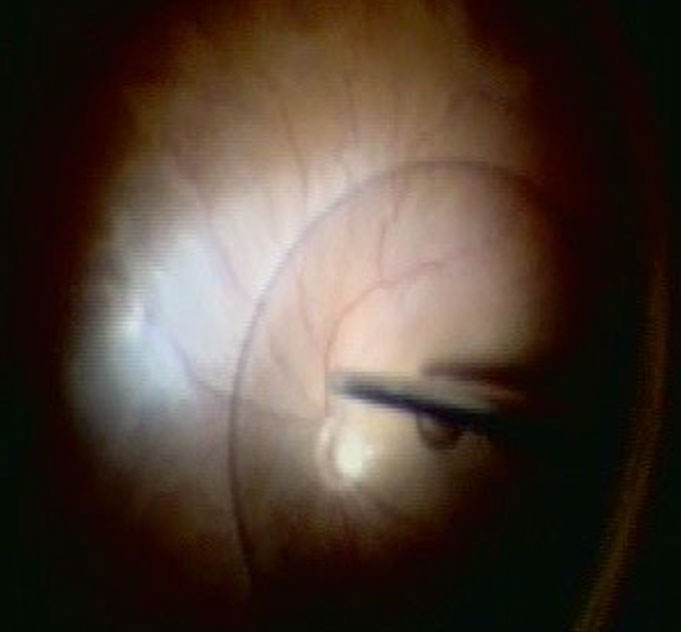
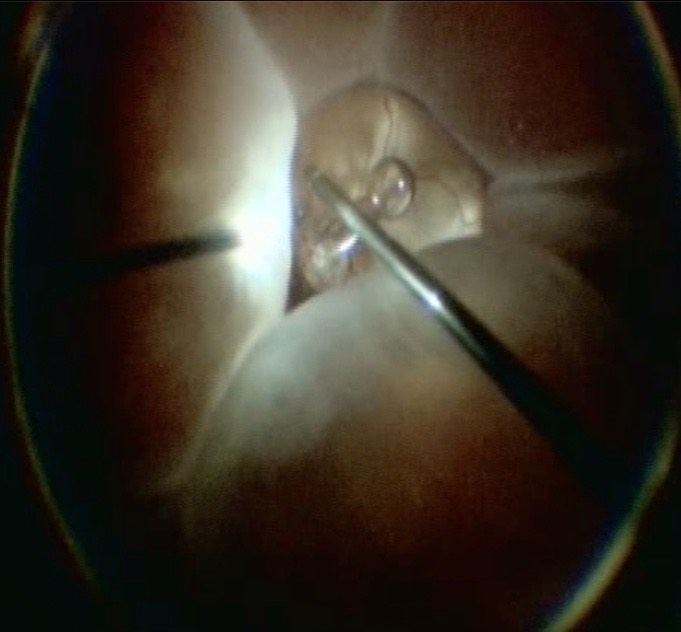
Figure 10.1.10 Perfluoro-n-octane (PFO)
A: Injecting PFO. Direct the tip of the cannula towards the optic disc. Ensure that the tip of the cannula stays within the growing PFO bubble
B: “Ballooning up” of the peripheral retina when PFO is injected suggests the absence of a peripheral break.
An iatrogenic break (posterior retinotomy, “R1”) can be made to drain subretinal fluid. Endodiathermy (e.g. at a power setting of 25, titrating up if necessary) is used to cauterize the retina at the selected site (Figure 10.1.11). A “mickey mouse” configuration of the retinotomy can be considered with three dots adjacent to each other. This configuration may lead to less expansion of the retinotomy and less bleeding during drainage. The retinotomy is then opened with a silicone soft-tipped backflush or extrusion cannula. The location of the retinotomy should be determined by:
- Location of the retinal detachment
- The retinotomy should be performed near the most posterior extent of the retinal detachment. Consider drawing an imaginary line between the optic nerve and the causative break.
- Likelihood to be covered by a tamponading agent
- Superior placement is preferred if gas or silicone oil is to be used; inferior placement is preferred if PFO or DENSIRON®68 is to be used
- Likelihood to induce a visual field defect
- Superior retinotomies (causing inferior visual field defects) are more likely to be noted by patients than inferior retinotomies (causing superior visual field defects)
Typically a nasal (away from the macula) or superior (covered by gas) location just outside the vascular arcades is chosen.
Once the PFO has been injected intravitreally or a posterior retinotomy performed, the sub-retinal fluid can be drained during a fluid-air exchange. There are two main methods to perform this- with active or passive aspiration.
i. Active
An extrusion cannula (some have a passive backflush option on the same instrument) allows active aspiration of fluid using the vitrectomy machine. When performing active extrusion, consider starting at the peripheral break (Figure 10.1.12) then moving to the retinotomy sequentially. Evacuation directly from the posterior retinotomy of thick subretinal fluid can lead to rapid enlargement of the posterior retinotomy and bleeding. Only approach the posterior retinotomy when the incoming air starts to push any residual subretinal fluid posteriorly and the retina surrounding the retinotomy starts to become bullous. Approaching the posterior retinotomy too early risks catching the edge with subsequent bleeding. Approaching too late risks the retina becoming too bullous and the posterior retinotomy becoming hidden.
ii. Passive
This involves elevating the intraocular pressure to a high level (e.g. 60mmHg), allowing fluid to be passively pushed out of the eye through the backflush cannula. The surgeon removes their thumb off the hole in the backflush cannula to allow aspiration of fluid. It has the advantage of being gentler and safer than active extrusion but has the disadvantage of being slower (especially if using 25- gauge instruments).
Note
- The author’s preference is for a small (23- 25-, or 27-gauge) extrusion cannula directly connected to the vitrectomy machine for active aspiration (if a posterior retinotomy has been performed). In both cases a silicone soft-tip cannula is less traumatic than a blunt-ended cannula
- If a 25-gauge cannula has been used to inject the PFO, active extrusion is preferred. Passive aspiration of PFO through a 25-gauge cannula is very slow, and requires elevation of the IOP to very high levels (e.g. 60mmHg) to work
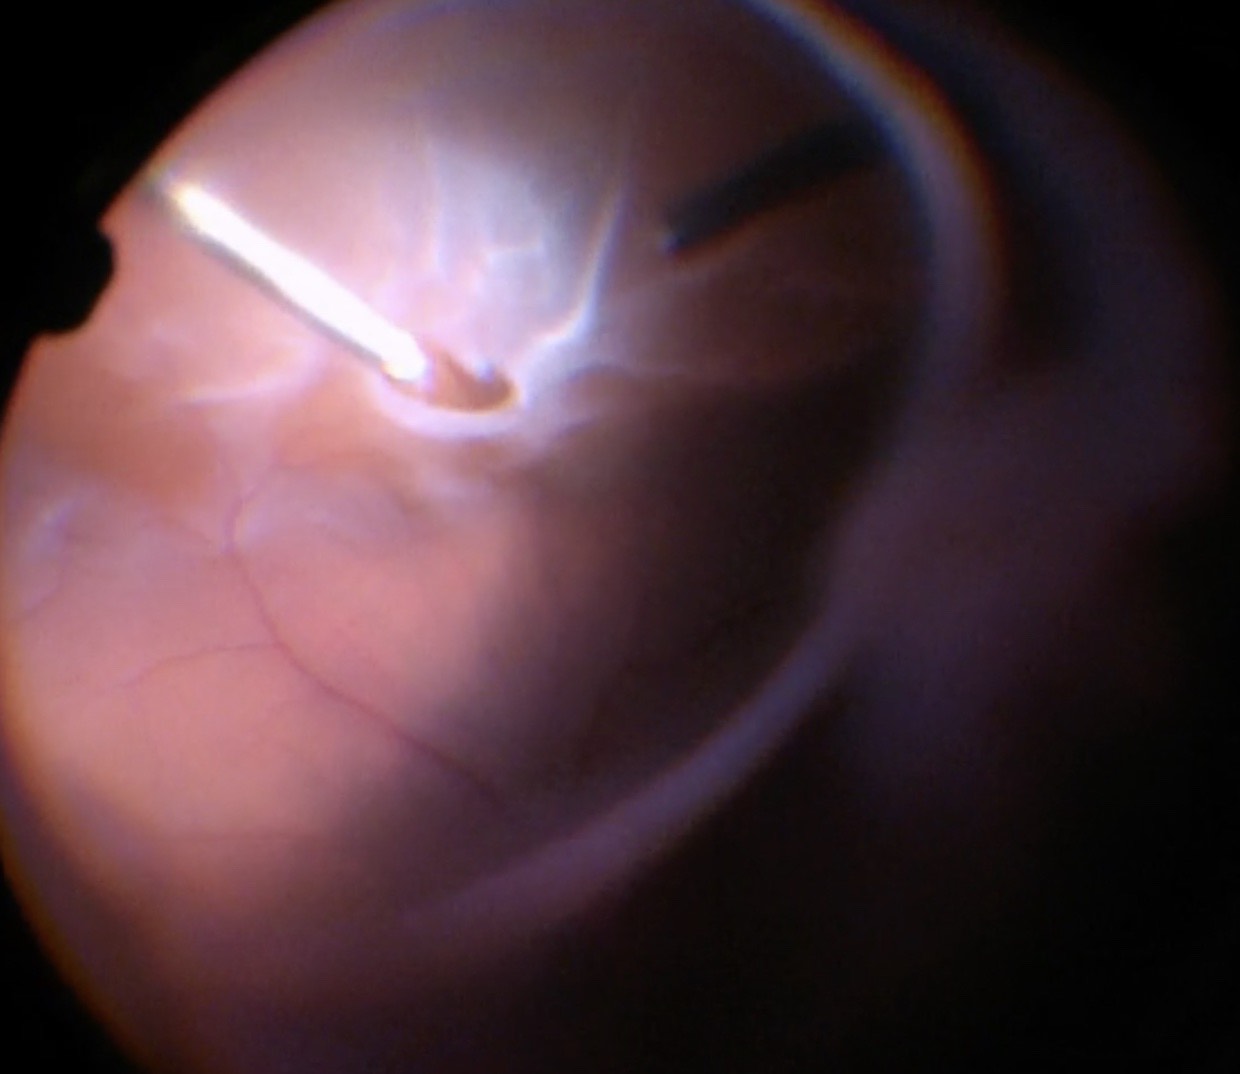
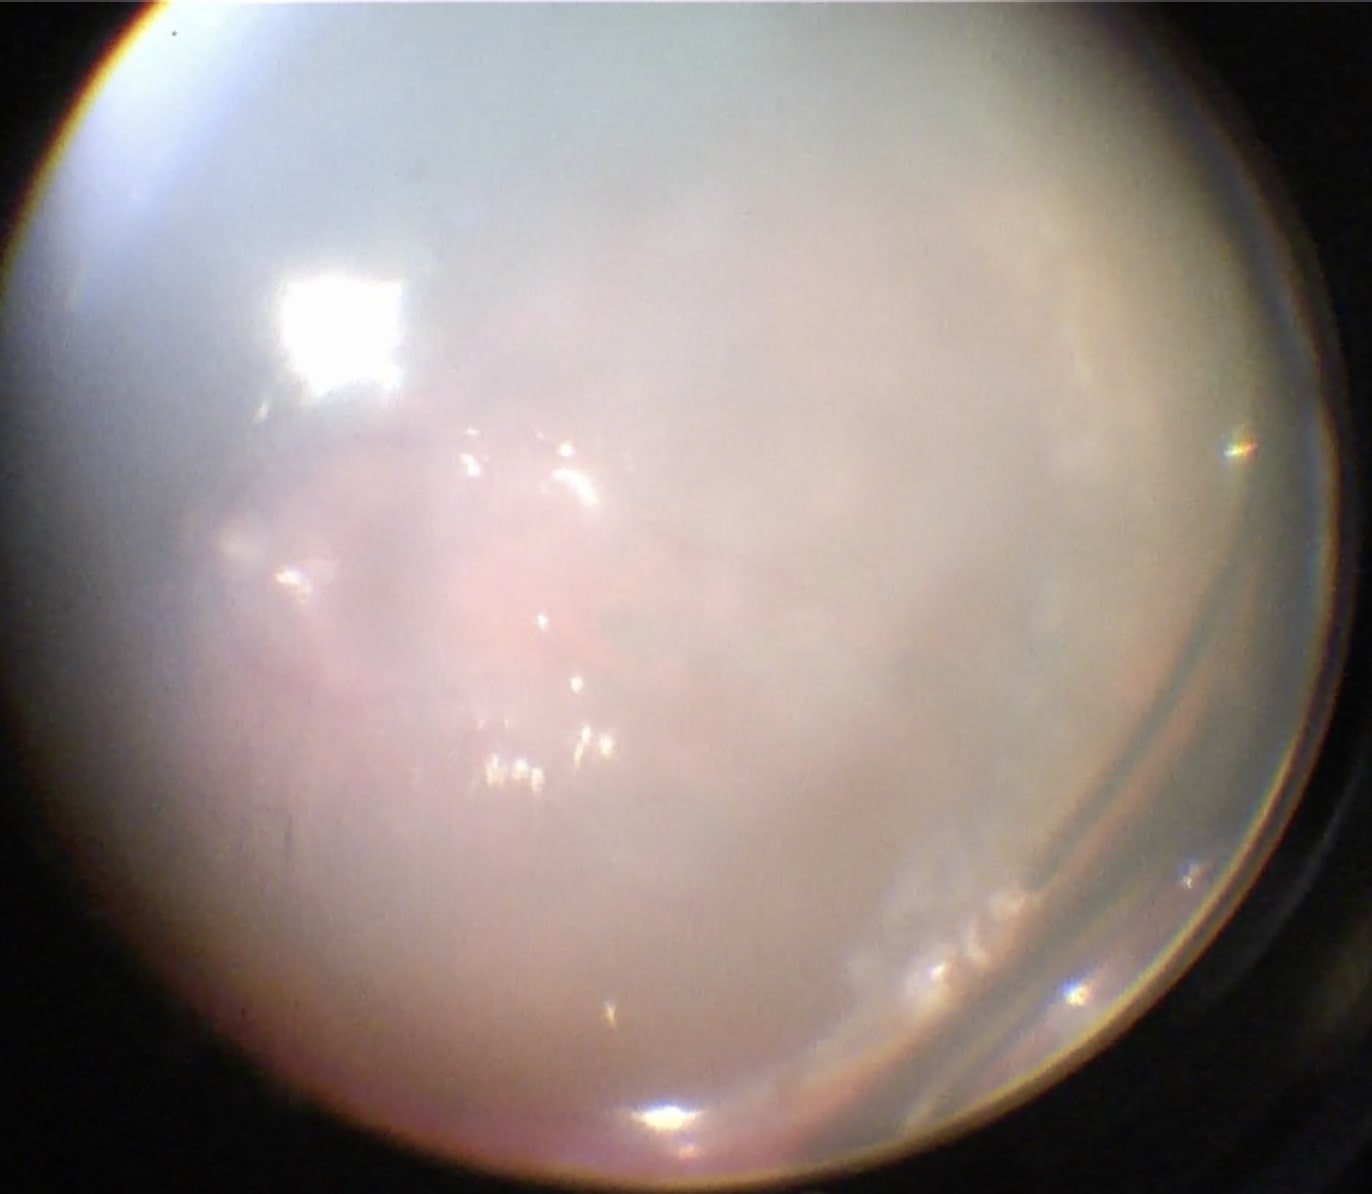
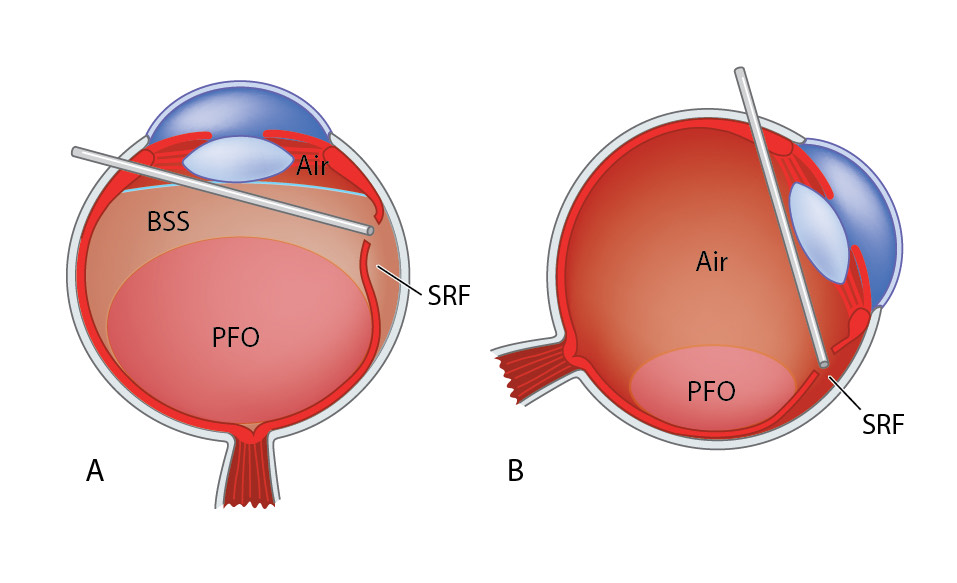
Figure 10.1.14 Drainage of Subretinal Fluid Using Perfluoro-n-octane (PFO)
A: Inject intravitreal PFO until its meniscus reaches the posterior edge of the most anterior break. Using a backflush or extrusion cannula, drain subretinal fluid (SRF) directly from the posterior edge of the break so that the retinal detachment decompresses. Then aspirate the BSS®. Once as much SRF has been drained as is possible, begin to drain the PFO. At this stage, further SRF may accumulate underneath break. Alternate between draining the SRF and PFO. Always maintain slight aspiration force as PFO may drip out of the aspiration instrument without doing so.
B: By rotating the eye, the break can be kept as inferior as possible, the meniscus of the PFO bubble remains at the posterior edge of the break, and a maximal amount of SRF can be drained. Finally, aspirate all the remaining PFO.
Figure 10.1.15 Posterior Retinotomy
A: A posterior retinotomy has been made just superonasal to the optic disc. The retinotomy is made with endodiathermy, then opened with a silicone soft-tipped backflush or extrusion cannula.
B: Drainage of subretinal fluid is seen as “schlieren”- extremely thick proteinaceous fluid from a chronic retinal detachment. In this case this dense fluid would not have been successfully displaced with PFO alone.
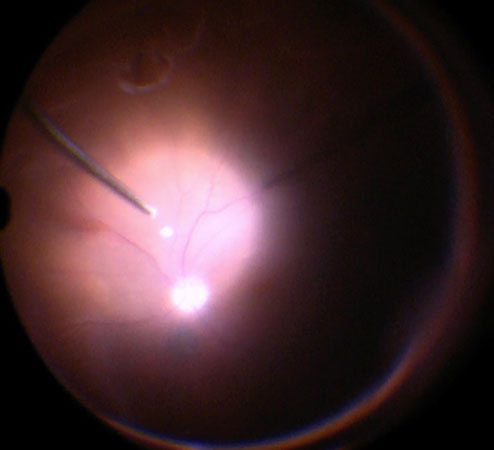
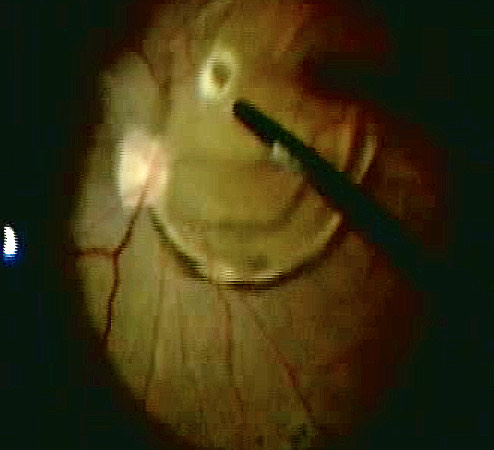
The endolaser is one of the more difficult intraocular instruments to master since it requires dexterity with both hands and good visualization through the microscope. It may be straight or curved. Some devices allow for a change of the curvature, once inserted intraocularly, by moving a knob on the handle. Many of the currently available endolaser probes carry a fiber to project the laser light onto the retina and also an illumination fiber, thereby having a simultaneous illumination of the area to be lasered with a central aiming beam.
It is advisable to use the endolaser at a low magnification as this increases the depth of field. When inserting the laser probe into the eye, make sure you point towards the central portion of the eye in order to avoid damaging the retina or dragging vitreous while inserting. Before applying laser to the retina, ensure the laser is perpendicular to the retinal surface. In order to reduce movements, use indentation to bring the area to be lasered closer to the optical center, this is particularly important in phakic patients where extensive maneuvers with the laser probe may lead to a lens touch.
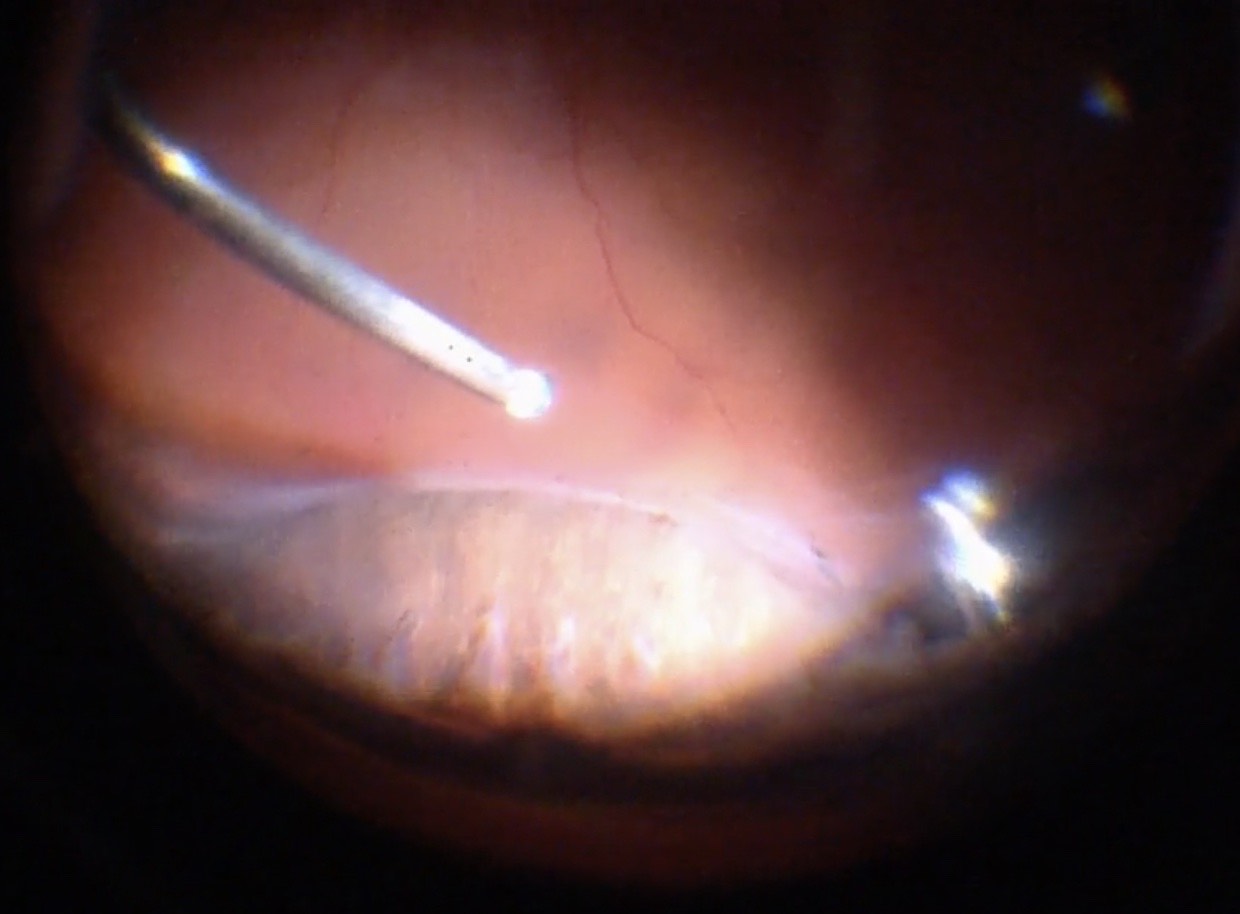
The settings for laser greatly depend on the individual patient. As a general rule, one should aim for grey-white laser spots that are separated by approximately one spot size apart. Each tear should be surrounded by 3 to 4 rows of laser. Other surgeons prefer confluent laser just at the edge of the tear, similar to the endodiathermy. In general only the retinal breaks need to be lasered, however some surgeons also like to laser the circumference of the peripheral retina in the area of retinal detachment (to cover for occult breaks). There is no consensus when or if 360° laser should be applied. Care should be taken to avoid burns that are white centrally or even “pop”. These effects can occur in situations where the energy setting is too high, or if the subretinal fluid has not been adequately drained. Such burns have the risk of breaking through Bruch’s membrane with the risk of subsequent choroidal neovascularization development, development of full thickness retinal breaks or even vitreous haemorrhage. If such a problem occurs, place extra laser spots around the heavy burns as with a regular tear. Remember that the peripheral retina is thinner and often requires lower power settings than the more centrally located retina. Typical settings to begin with are 200mW power, 200ms duration and 200ms interval time. In cases of high myopia or lightly pigmented fundi, the duration can be increased instead of the power. If no adequate laser burn can be achieved (e.g. very anterior breaks with difficult visualization in a phakic patient or when there is still residual subretinal fluid), consider performing cryotherapy instead of laser (Figure 10.1.17). The surgeon should take care to laser in areas where the retina is well attached to the retinal pigment epithelium (not over detached retina) and not laser on the pigmented epithelium directly (i.e. not within the break or tear).
All rights reserved. No part of this publication which includes all images and diagrams may be reproduced, distributed, or transmitted in any form or by any means, including photocopying, recording, or other electronic or mechanical methods, without the prior written permission of the authors, except in the case of brief quotations embodied in critical reviews and certain other noncommercial uses permitted by copyright law.

Westmead Eye Manual
This invaluable open-source textbook for eye care professionals summarises the steps ophthalmologists need to perform when examining a patient.