3 Vitreoretinal Surgery Fundamentals
3.1 Opening and Vitrectomy Basics
Povidone-iodine, a sterile drape and an eyelid speculum are essential for sterility.
Ensure eyelashes are out of the field (dry the eye well, use a sterile cotton bud or needle cap to pull the upper lid up whilst adhering the sterile drape).
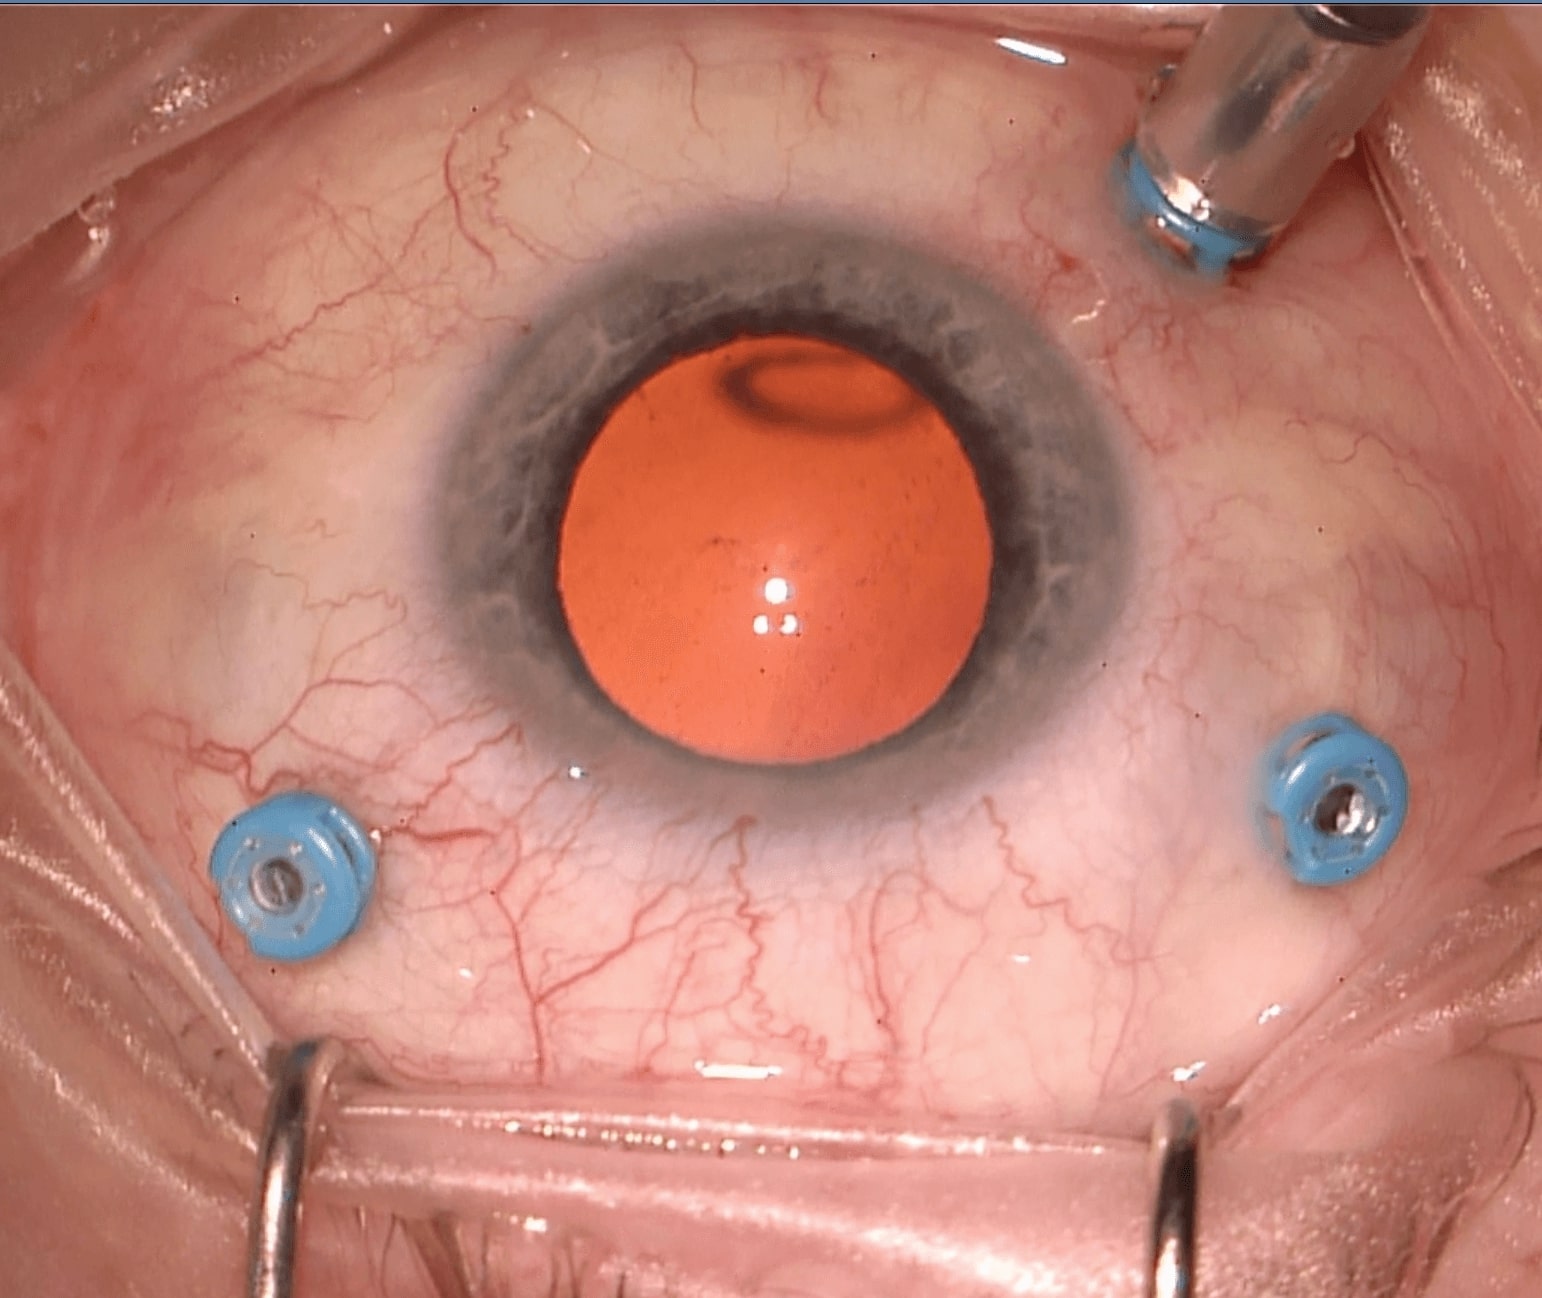
The typical three port vitrectomy has the ports (sclerostomies) in the following positions (Figure 3.1.1):
Right Eye
Left Eye
1. Inferotemporal
Right Eye
~7:30 o’clock (infusion line)
Left Eye
~4:30 o’clock (infusion line)
2. Superior (Non-dominant Hand, e.g. Left)
Right Eye
~2:30 o’clock (light pipe)
Left Eye
~2:30 o’clock (light pipe)
3. Superior (Dominant Hand, e.g. Right)
Right Eye
~9:30 o’clock (cutter)
Left Eye
~9:30 o’clock (cutter)
The sclerotomies should be positioned 3.0-3.5mm (aphakic / pseudophakic) to 3.5-4.0mm posterior to the limbus. The measurement guide on the back end of the trocar can be used to verify this. The actual sclerotomy positions may need to be tailored depending on the eye involved (e.g. presence of a current or future trabeculectomy bleb, glaucoma drainage device, prior vitrectomy insertion sites, scleral buckle etc.). Don’t position the superior sclerostomies too close to each other superiorly, as this makes it harder to reach the superior vitreous and/or rotate the eye position. Consider positioning the superior sclerotomies more inferior if the superior vitreous and retina needs to be accessed (e.g. for a superior retinal detachment), and the nasal sclerotomy more superior if the patient has a prominent nose. If possible, avoid placing the infusion line near areas of pathology (retinal or choroidal detachment).
Note
In adults the pars plicata is approximately 2.5mm wide. The pars plana is posterior to this and is approximately 3.0mm wide (nasally) to 4.5mm wide (temporally). This is narrower in pediatric patients.
Microincision Vitrectomy Surgery (MIVS) has become standard worldwide. It has the advantages of trans-conjunctival sclerostomy cannulae, a lower risk of vitreous or retinal incarceration into the sclerostomies (especially with valved cannulae), smaller intraocular instruments that allow for more precise tissue manipulation and smaller wounds providing the possibility of sutureless surgery. The disadvantages include greater difficulty with injection / removal of silicone oil, absence of a small gauge fragmatome, more flexible intraocular instruments that are harder to manipulate the eye with, and greater risk of overwhelming the infusion when “hybrid” (small gauge infusion, 20-gauge fragmatome) procedures are performed.
1. Inferotemporal (Infusion) Sclerostomy
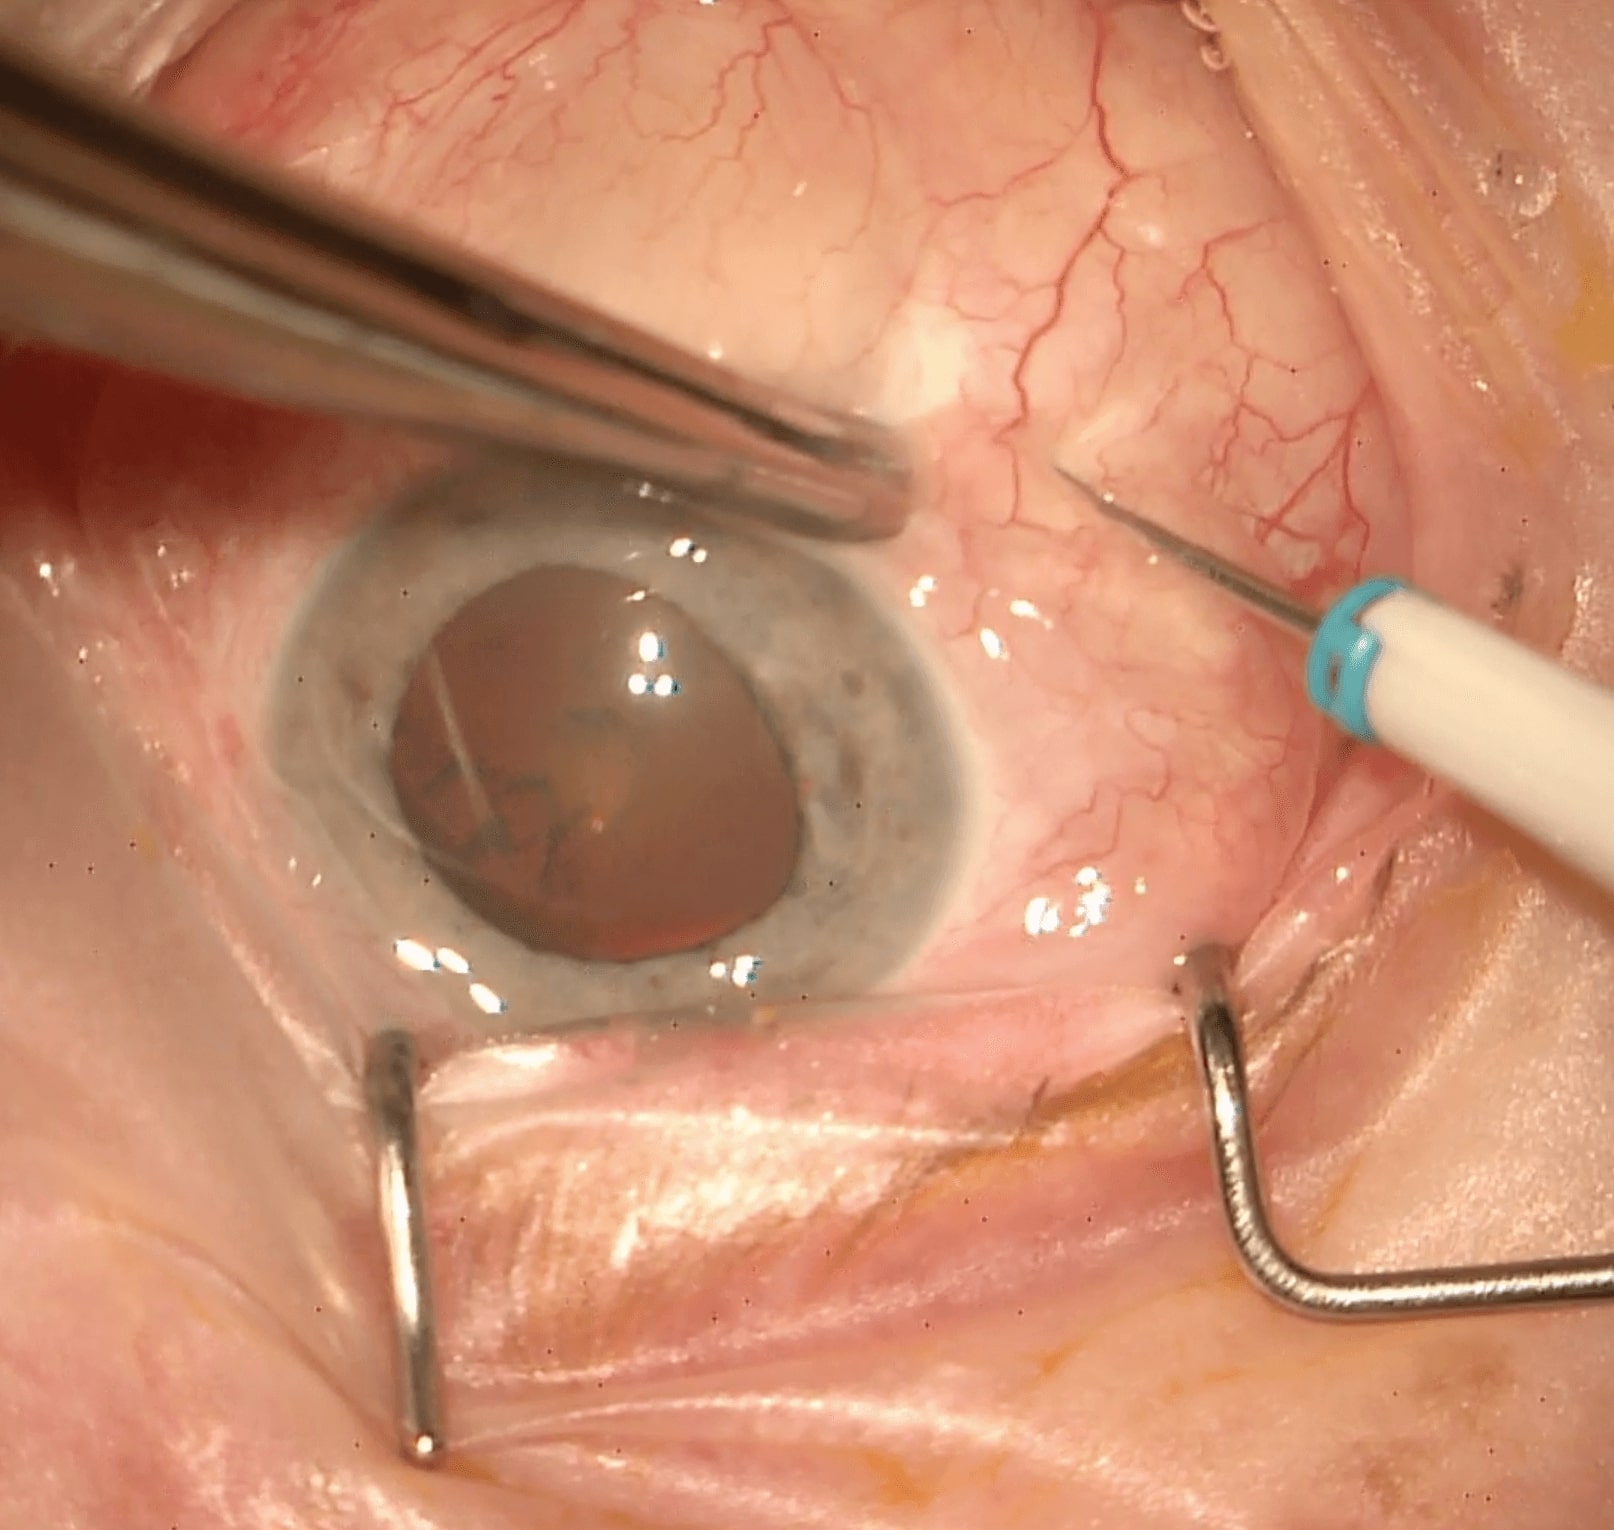
- Displace the inferotemporal conjunctiva with conjunctival / Bonaccolto forceps or a cotton tip / bud. Alternatively, use open conjunctival / Bonaccolto forceps to stabilise the eye, and displace the conjunctiva with the trocar tip atraumatically to avoid tearing the conjunctiva or causing hemorrhage (Figure 3.1.2)
- Perform a two-step sclerostomy incision. Hold the trocar with the flat edge of its blade against the sclera, inserting it halfway at 30 degrees to the sclera until the end of the cannula is reached and the sclera is engaged. Then turn the trocar so that is 90 degrees to the scleral surface and is pointing towards the mid-vitreous. Insert the trocar / cannula fully with a twisting motion to avoid indenting the globe
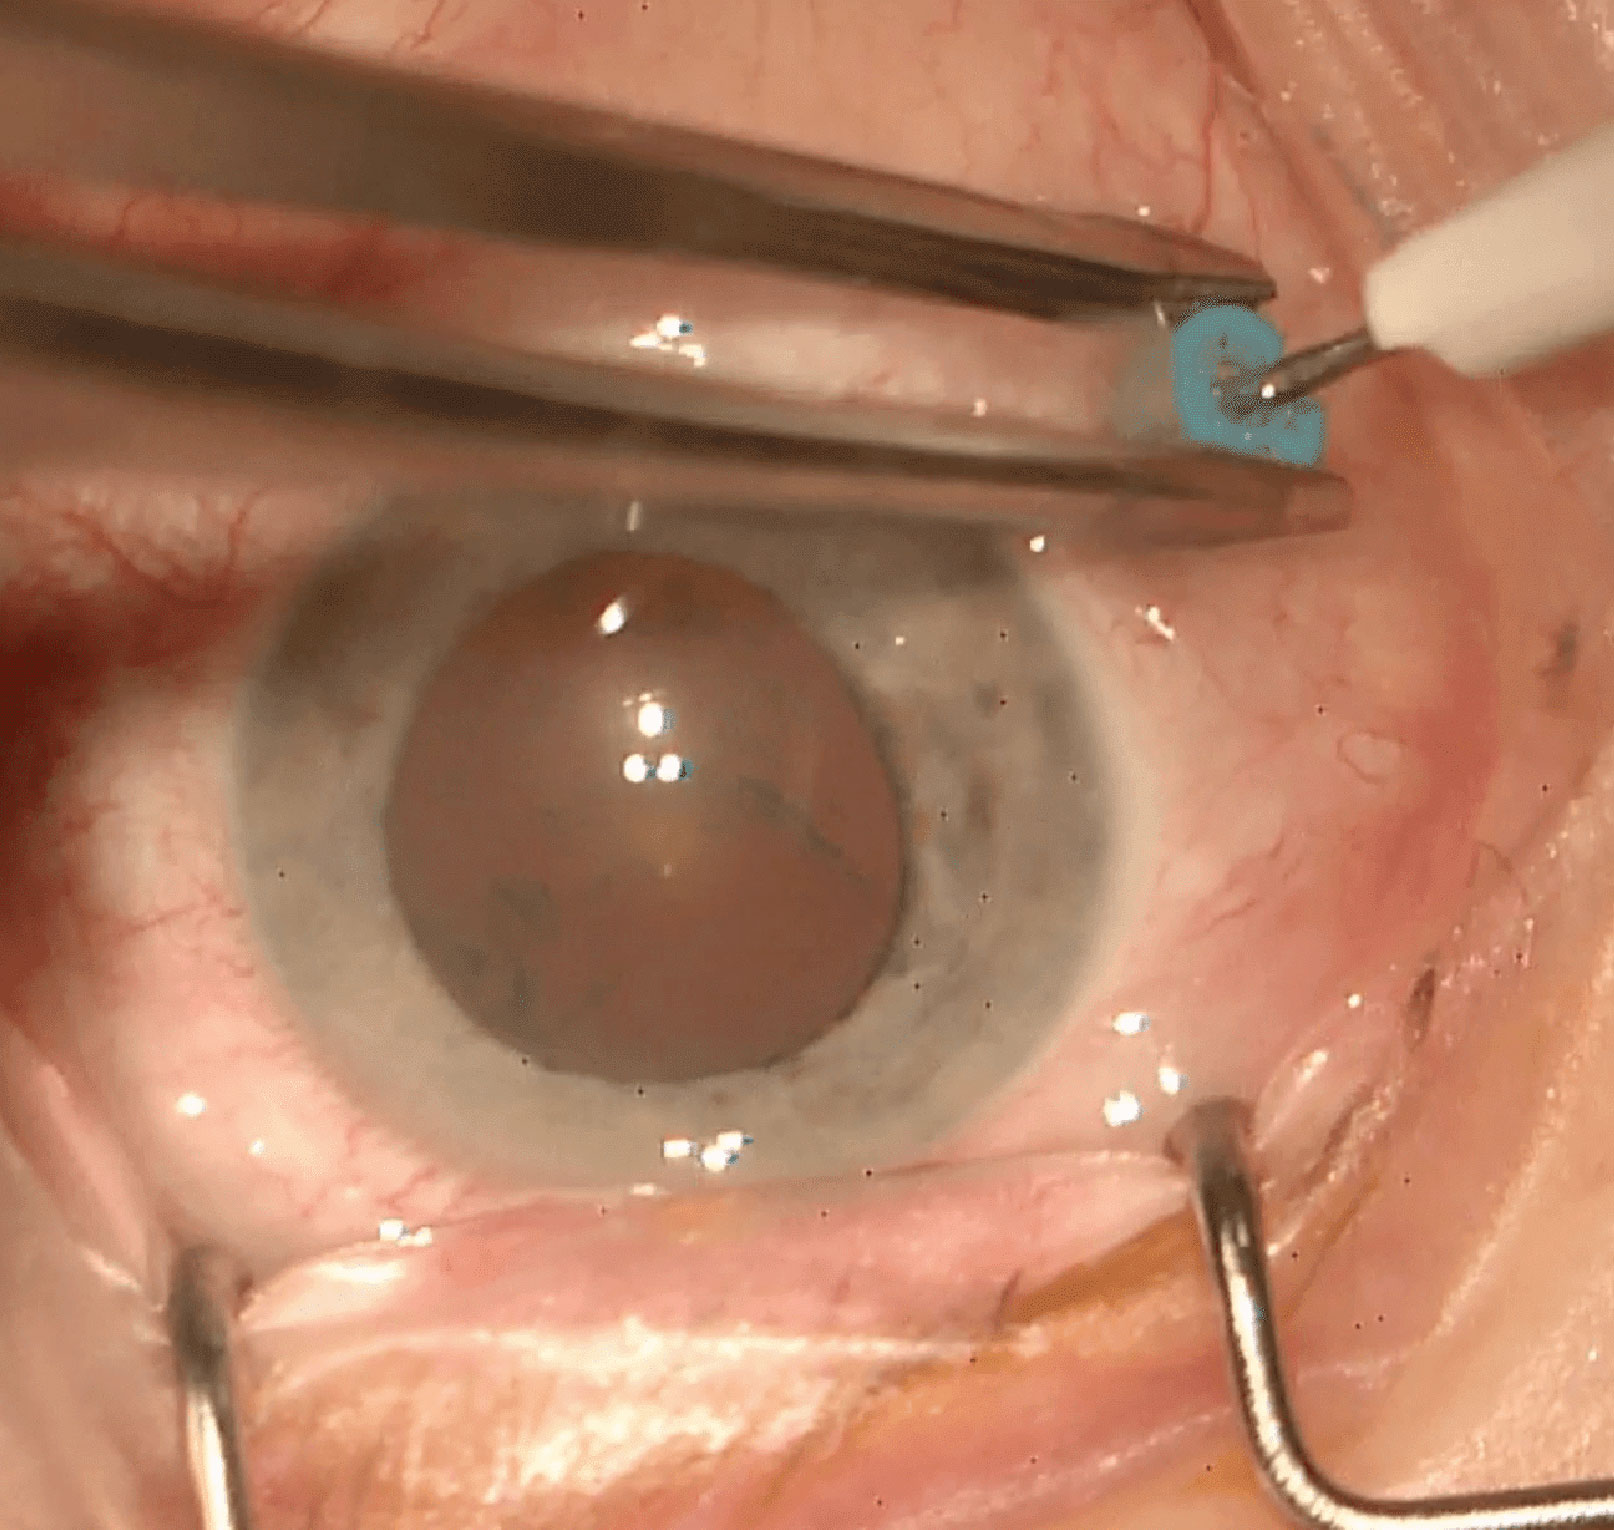
- Turn the infusion on then off outside the eye to clear any air bubbles (NB: The infusion line should not be inserted into the eye whilst switched on as this may cause a suprachoroidal effusion). Insert the infusion line (pinch it between your thumb and index finger and ensure that it “clicks” into the cannula). In a vitrectomised eye this procedure needs to be performed quickly to avoid vitreous cavity aqueous loss and hypotony unless a valved cannulae is used
- Check that the tip of the infusion cannula is intravitreal (either through the operating microscope or through the pupil with the light pipe on and operating microscope off)
- Secure the infusion line onto the plastic drape with adhesive tape (e.g. Steri-Strip™)
- Turn the infusion line on
Note
Sclerostomy entry angles differ amongst surgeons:
- Two-step
- This technique (as described above) is commonly employed. An acute-angled entry has the least risk of leakage but risks the cannula tip lying in the suprachoroidal space.
- Perpendicular
- This has the least risk of the cannula tip becoming suprachoroidal, but the greatest risk of leakage with increased risk of endophthalmitis. It may be useful if there are choroidal detachments or it is planned to suture the sclerostomies. If it is planned that the sclerostomy will be sutured, it is best not to displace the conjunctiva as this makes it difficult to find the sclerostomies later.
2. Superonasal Sclerostomy
Using Bonaccolto forceps to hold the infusion cannula, turn the eye inferotemporally. Using the trocar (or Bonaccolto forceps) to “drag displace” conjunctiva, insert it as described above. The trocar can be left in place to allow stabilization of the eye, or removed and the forceps used to stabilize the eye.
3. Superotemporal Sclerostomy
Using the trocar to “drag displace” conjunctiva, insert it until sclera is engaged and twist the trocar into the eye. The side of one trocar can be used to keep the other cannula in place whilst removing that trocar.
Note
- Avoid pushing the trocars directly into the eye. If excessive force is applied in a hypotonous eye, the tip of the trocar may traumatise the retinal surface directly opposite
- Valved cannulae obviate the need for cannulae plugs. Valved cannulae may prevent vitreous egress through the cannulae and incarceration in the sclerotomies
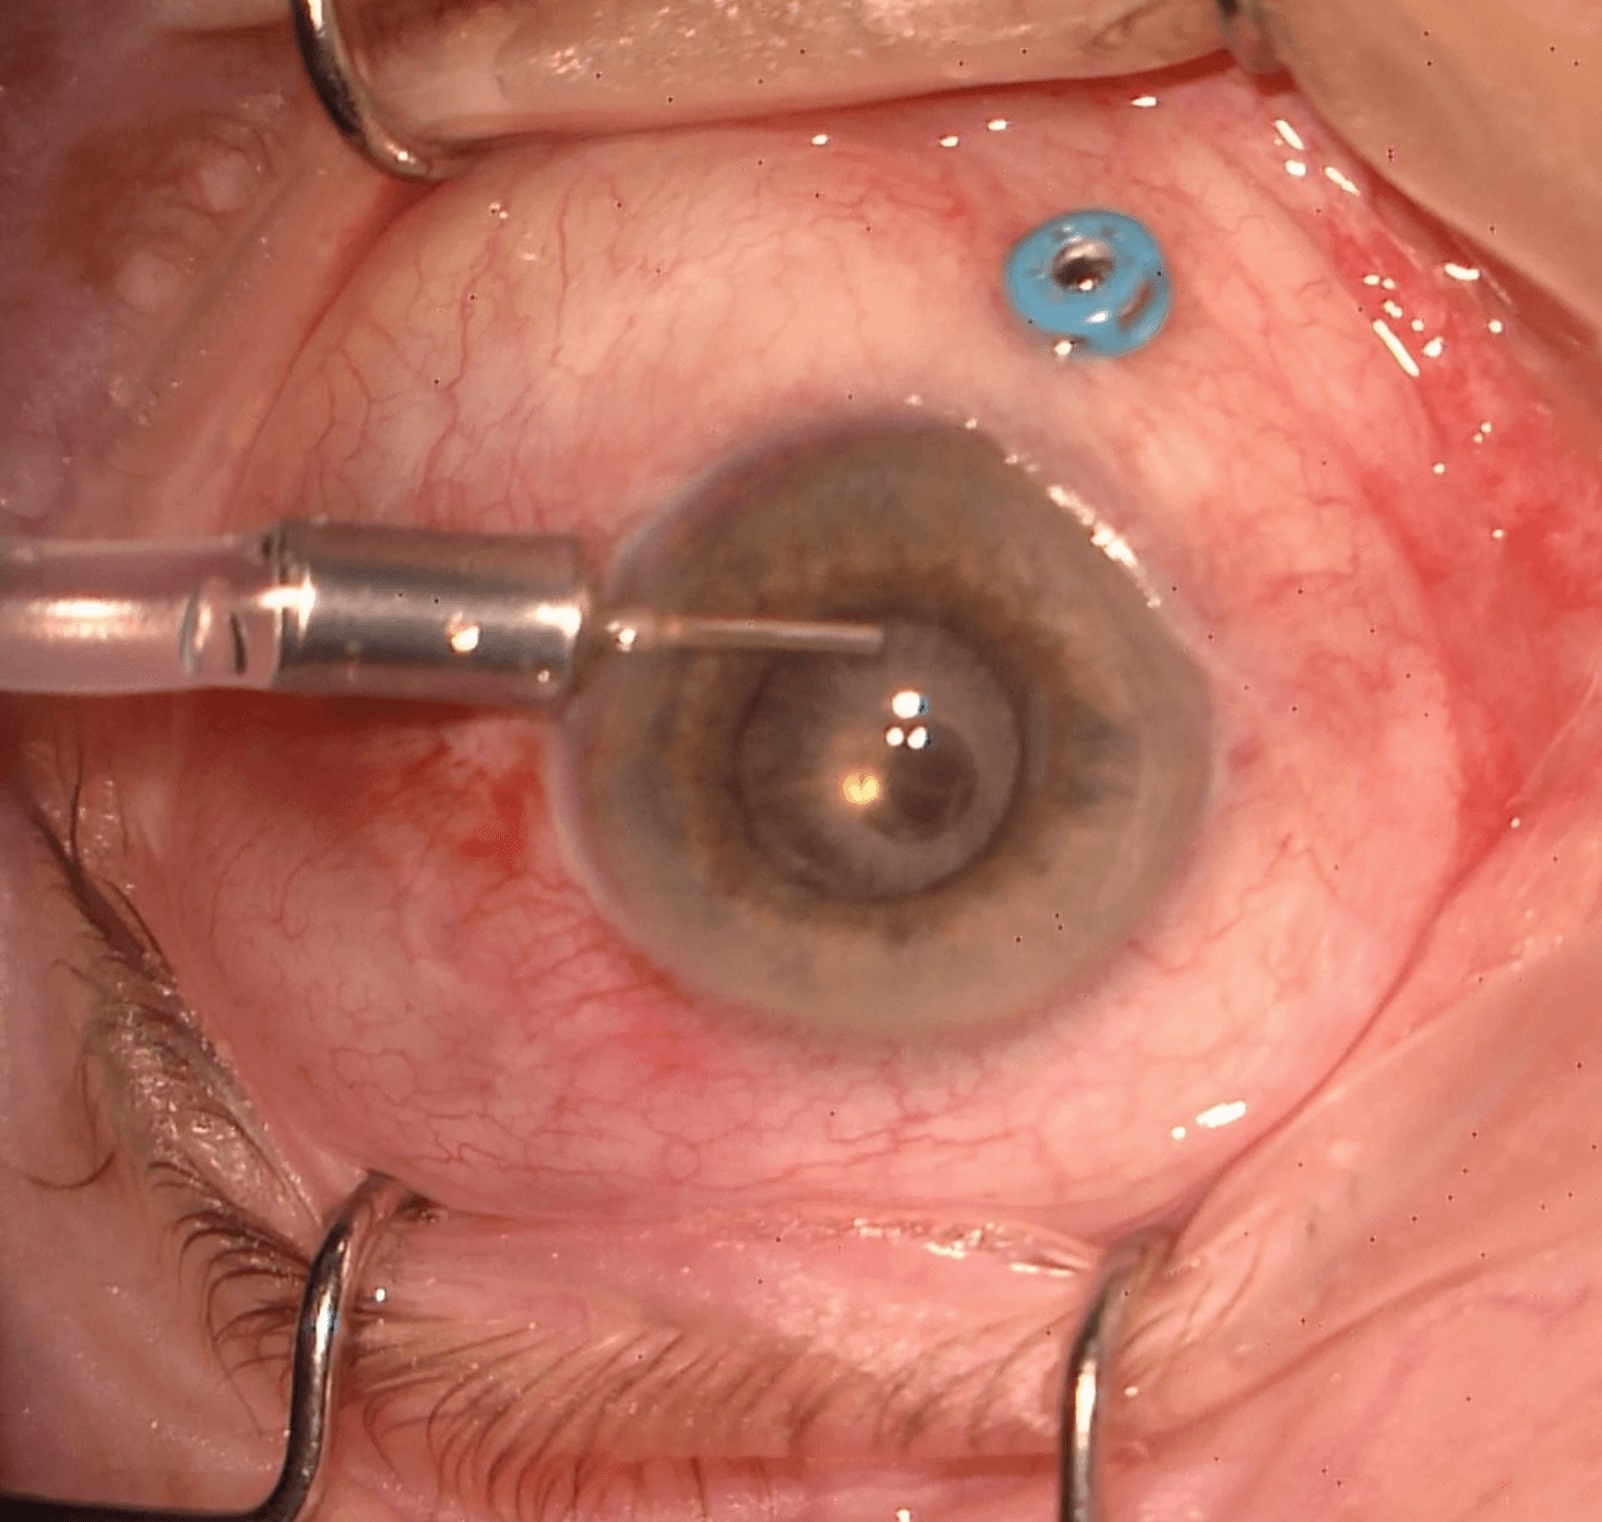
Note: Anterior Chamber Infusion
If a pars plana infusion line cannot be viewed (e.g. dense vitreous hemorrhage), an anterior chamber infusion should be placed first to avoid inadvertent suprachoroidal infusion (Figure 3.1.3)
± Anterior Vitrectomy
Anterior vitrectomy may be useful if the view is poor (dense vitreous haemorrhage, endophthalmitis etc.). Be careful not to traumatise the lens in a phakic patient. In a pseudophakic patient, clear any significant posterior capsular opacification (PCO) with the cutter.
- Enter the eye with the light pipe on (only insert it just within the sclerostomy)
- Lift the operating microscope
- Turn the operating microscope light off
- Turn the room lights off
- Invert the image
- Adjust the microscope to focus on the retina
- The infusion pressure should be set to the minimum such that the eye wall does not collapse. This depends on several factors, including vitrectomy machine, volume of retrobulbar / peribulbar anaesthesia, scleral rigidity, clearance of vitreous from the infusion line and wound leak
Previous
2.6 Robotics
Next
3.2 Closure
All rights reserved. No part of this publication which includes all images and diagrams may be reproduced, distributed, or transmitted in any form or by any means, including photocopying, recording, or other electronic or mechanical methods, without the prior written permission of the authors, except in the case of brief quotations embodied in critical reviews and certain other noncommercial uses permitted by copyright law.

Westmead Eye Manual
This invaluable open-source textbook for eye care professionals summarises the steps ophthalmologists need to perform when examining a patient.