11 Rhegmatogenous Retinal Detachment – Scleral Buckle
11.1 Scleral Buckle
Scleral buckling was first described for the repair of rhegmatogenous retinal detachment in 1949.[1] Scleral buckles indirectly relieve vitreous traction by scleral indentation. This is usually combined with retinopexy (laser or cryotherapy) to the retinal break(s), which prevents liquefied vitreous access to the sub-retinal space. The sub-retinal fluid is pumped out by the retinal pigment epithelium.
Unfortunately, in some training centres the teaching of sclera buckling is diminishing as vitrectomy becomes more popular. Nevertheless, the authors believe that all vitreo-retinal surgeons should be proficient in scleral buckling, as there are many scenarios when it is advantageous over vitrectomy in the repair of retinal detachment (Figure 11.1.1) and post buckle completion at (Figure 11.1.3.20B).
Custodis E. Beobachtungen bei der diathermischen Behandlung der Netzhautablösung und ein Hinweis zur Therapie der Amotio retinae. Ber Dtsch Ophthalmol Ges. 1952;57:227-229.
Indications and contraindications for primary scleral buckling (alone) may include:
Indications
- Young myopic patients (without a posterior vitreous detachment), particularly those under 50 years of age
- Phakic lens status
- Inferior (gas or silicone oil tamponade is less effective), anterior, atrophic breaks
- Retinal dialyses
Contraindications
- Significant media opacity limiting 360° peripheral examination: corneal scar, cataract, vitreous hemorrhage
- Proliferative vitreoretinopathy Grade B or higher
- Special cases where vitrectomy is generally preferred (although scleral buckling has been described): giant retinal tear with detachment, macular hole retinal detachment, myopic macular detachment
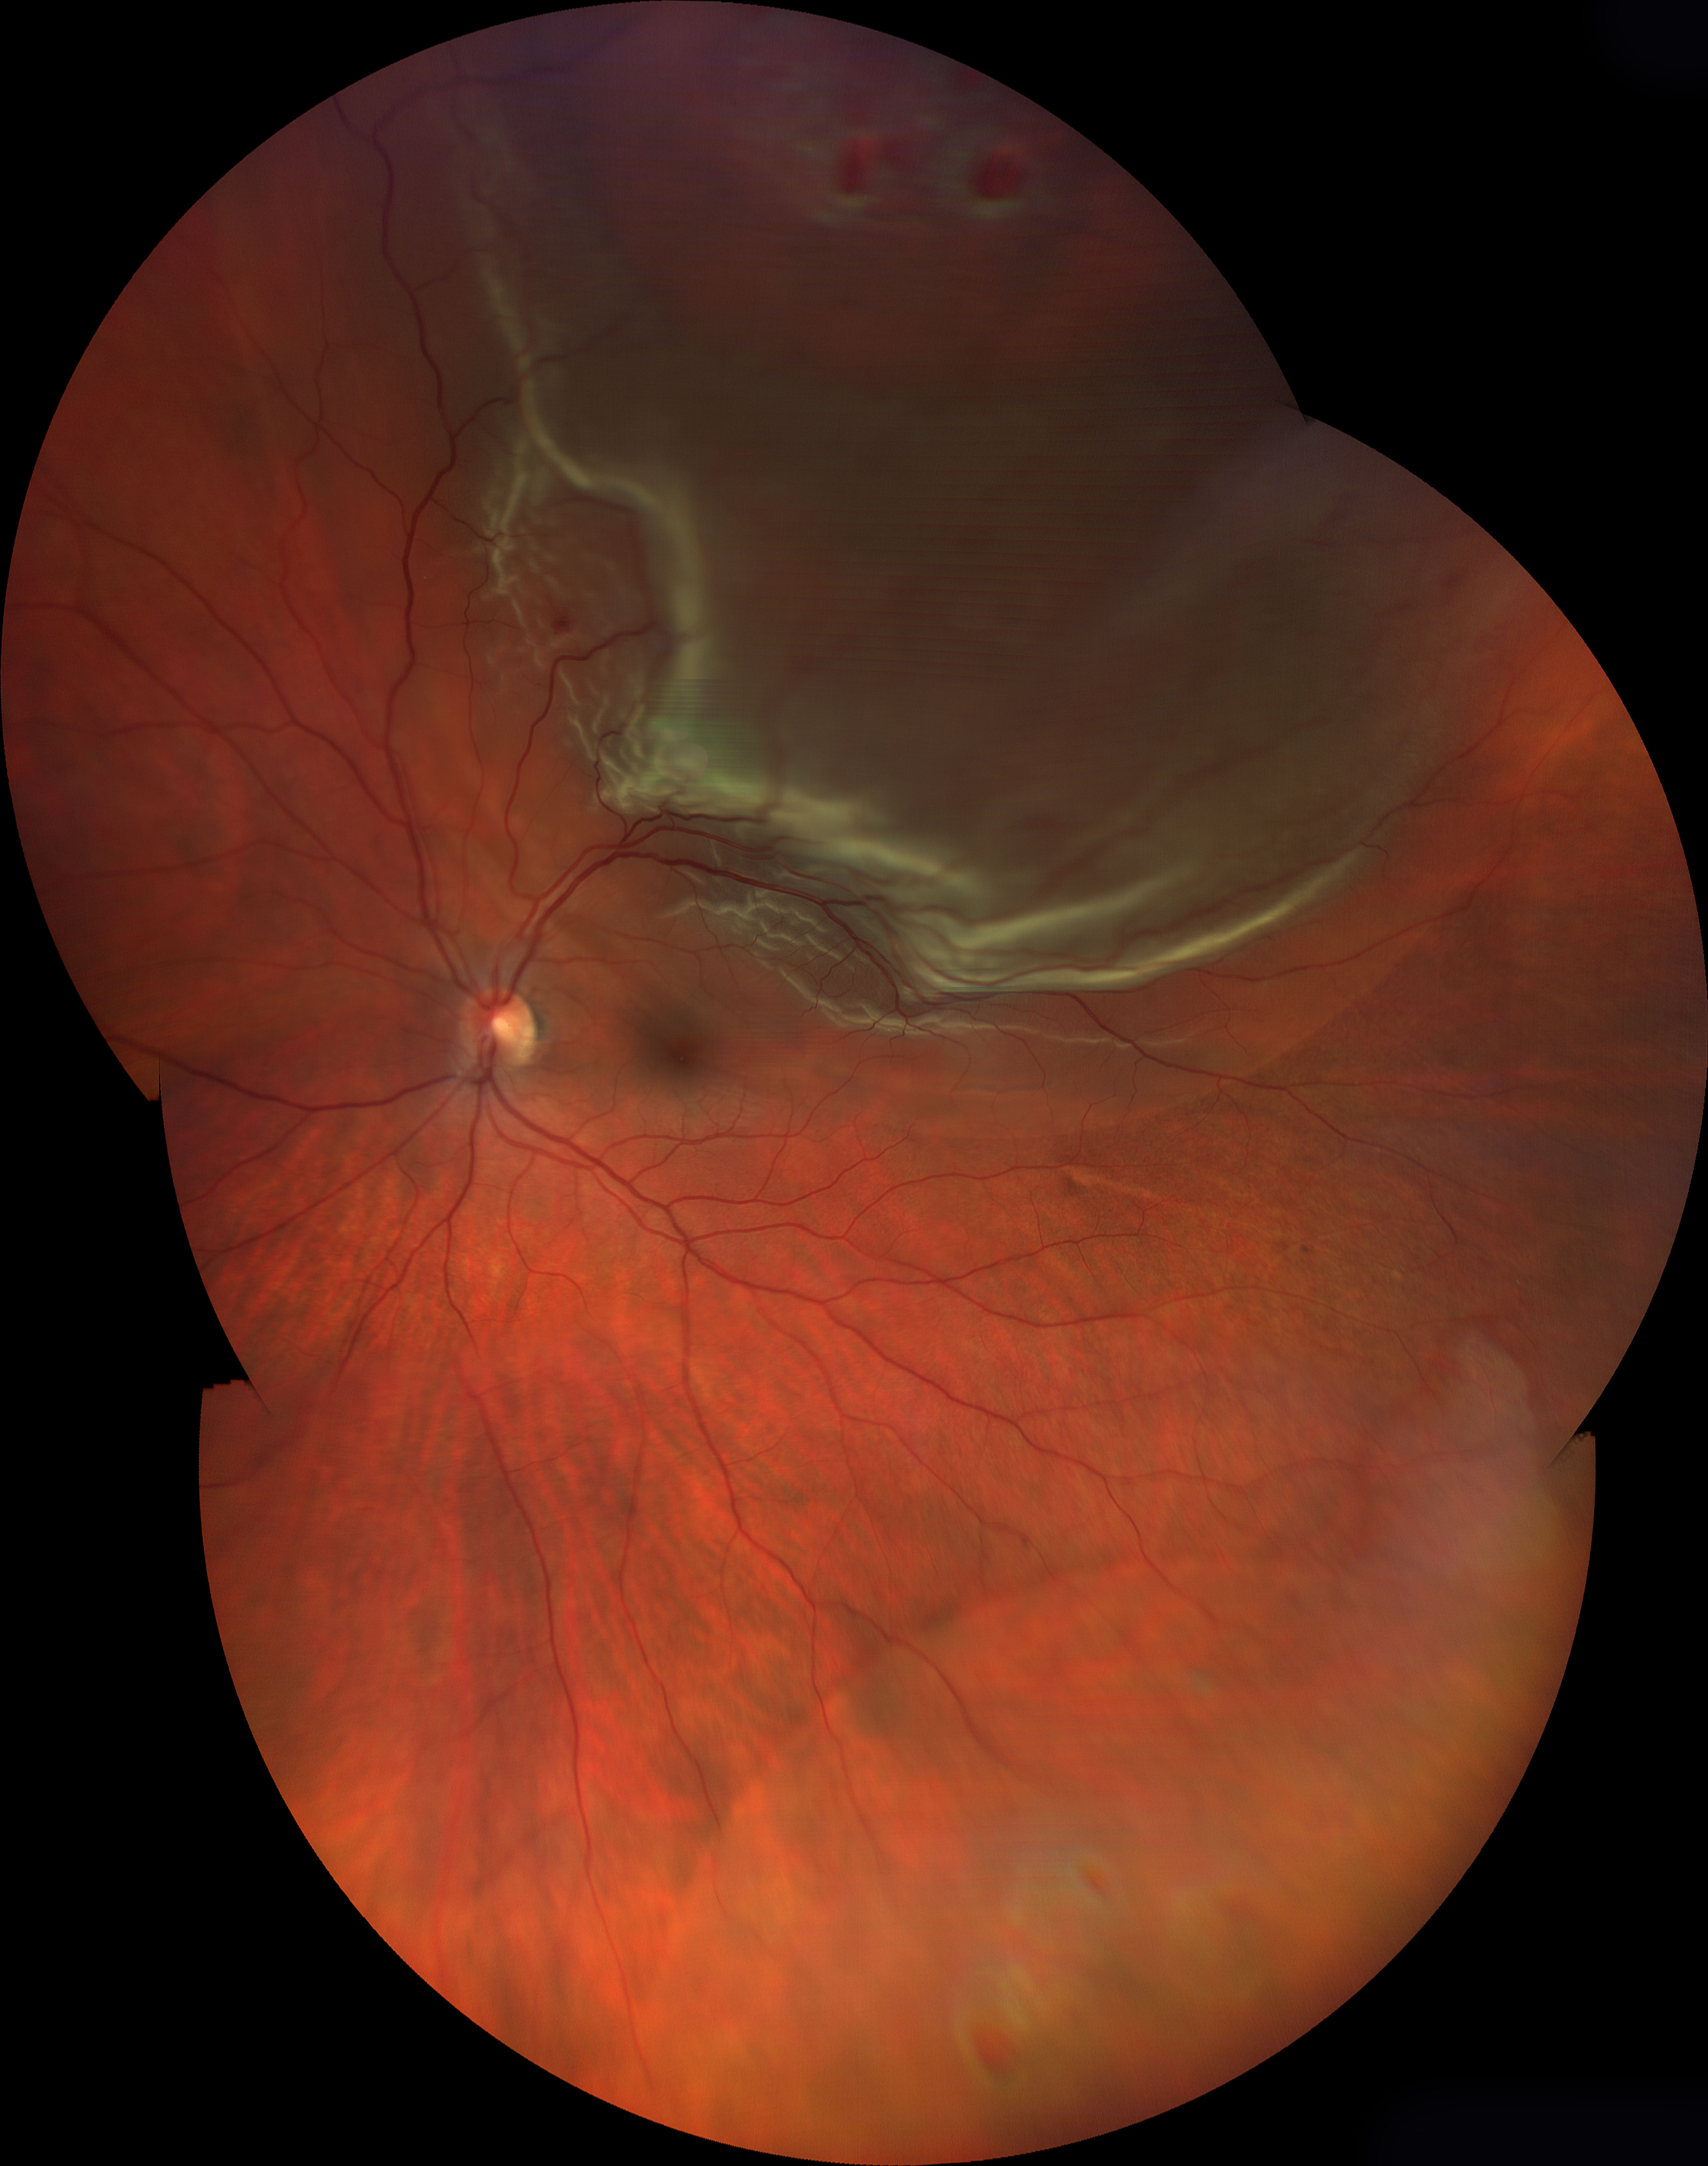
Figure 11.1.2 Phakic Retinal Detachment with Multiple Breaks
The presence of more than one break greater than 2 clock hours apart (and one being inferior) makes pneumatic retinopexy unsuitable. Scleral buckling is a good choice in this retinal detachment.
A
B
C
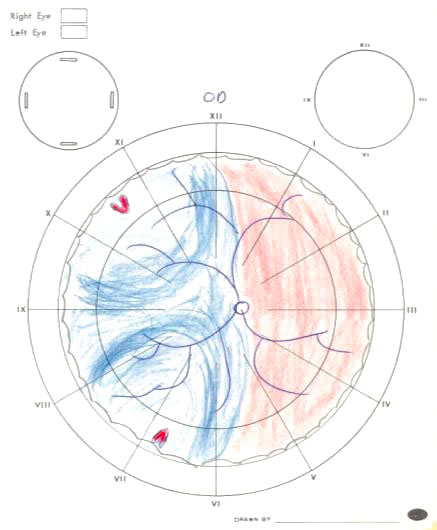
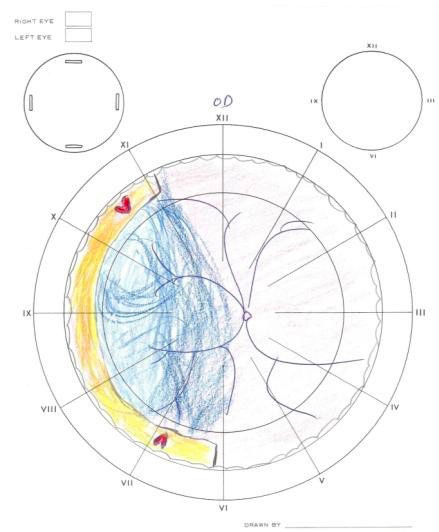
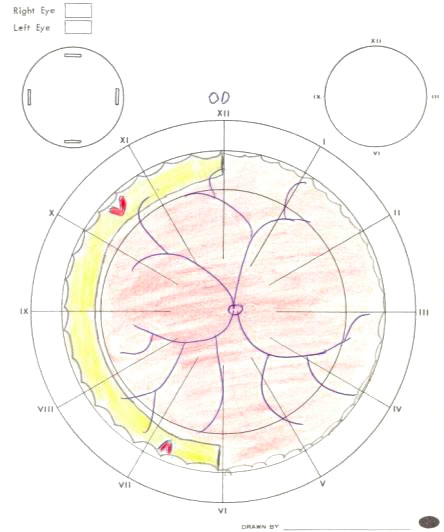
Figure 11.1.2 Phakic Retinal Detachment with Multiple Breaks
The presence of more than one break greater than 2 clock hours apart (and one being inferior) makes pneumatic retinopexy unsuitable. Scleral buckling is a good choice in this retinal detachment.
Pre-operation
Mark eye, check informed consent. Dilate pupil.
Note
If undergoing a scleral buckle following a failed pneumatic retinopexy, avoid having the patient lie supine pre-operatively as this can induce a “gas cataract” that will make the surgery more difficult
Anesthesia
Most patients will tolerate a scleral buckle under local (peribulbar or retrobulbar) anesthesia. In general, this is a more painful operation than a vitrectomy. Some patients will require intra-operative supplementation with sub-Tenon’s anesthesia, or a general anesthesia.
Preparation & Drape
Povidone-iodine and an eyelid speculum are essential for sterility.
Ensure eyelashes are out of the field (dry the eye well, use a sterile cotton bud or needle cap to pull the upper lid up whilst adhering the sterile drape).
Surgeon Orientation & Set-up
Scleral buckles can be performed standing or sitting, with or without an operating microscope. An operating microscope gives good visualisation for scleral sutures and is beneficial for presbyopic surgeons, but may make it more difficult to manipulate instruments around the eye. Some surgeons use loupes if not using an operating microscope.
Accurate pre-operative localisation of breaks and the extent of retinal detachment with scleral indentation is the first step in achieving a successful scleral buckle (Figure 11.1.2). A detailed pre- operative drawing should be performed in all patients. Correct initial placement of a scleral buckle is essential, because fibrosis makes revision of a scleral buckle extremely difficult.

1. 360-degree Conjunctival Peritomy (Figure 11.1.3.2)
- Use conjunctival (Bonaccolto) forceps to lift the conjunctiva and Tenon’s capsule, whilst cutting it with Westcott scissors. Marking the 3 and 9 o’clock positions can assist with closure later
- ± Create radial relaxing incisions at 3 and 9 o’clock to prevent tearing
Note
Remember that Tenon’s capsule inserts into the sclera posterior to the corneal limbus. Although the conjunctival peritomy should occur close to the corneal limbus, blunt dissection must occur posteriorly enough to capture both Tenon’s capsule and conjunctiva
Options
- A recessed conjunctival peritomy, approximately 2mm posterior to the limbus is an alternative in young patients who are contact lens wearers. If this is performed, a continuous running suture is preferable for closure
- If a segmental tire without circumferential band or a radial sponge is to be inserted, a full 360 degree conjunctival peritomy is unnecessary. The conjunctival peritomy can be performed in the region where the explant will be inserted. If a rectus muscle needs to be mobilised where there is no conjunctival peritomy, a 4-0 silk suture can be passed underneath it with a vascular needle
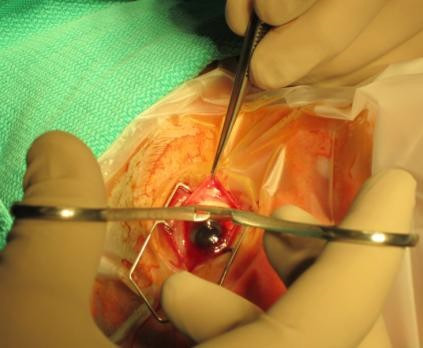
Figure 11.1.3.2 Conjunctival Peritomy
A: Marking the limbus at 3 and 9 o’clock can assist in accurate conjunctival closure at the conclusion of the operation.
B: Blunt dissection of the conjunctival and Tenon’s capsule is performed with Westcott scissors, before they are cut close to the limbus.
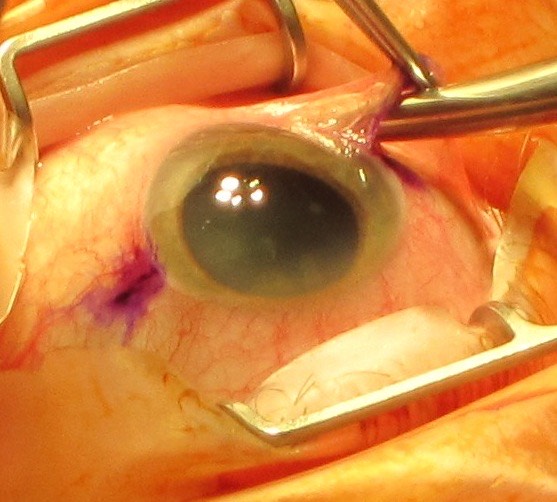

Figure 11.1.3.2 Conjunctival Peritomy
A: Marking the limbus at 3 and 9 o’clock can assist in accurate conjunctival closure at the conclusion of the operation.
B: Blunt dissection of the conjunctival and Tenon’s capsule is performed with Westcott scissors, before they are cut close to the limbus.
2. Dissect Tenon’s Capsule (Figure 11.1.3.3)
- Use Steven tenotomy scissors in four quadrants between the rectus muscles
- Cut Tenon’s capsule to form a “pocket”, insert the Stevens tenotomy scissors fully in, then open them to blunt dissect and remove with them still open. This breaks any remaining adhesions between Tenon’s capsule and sclera
3. Sling Each of the Rectus Muscles (Figure 11.1.3.4)
Order: Horizontal recti muscles, inferior rectus, superior rectus.
Generally the superior rectus is left until last since it is hardest to sling given its difficult exposure and close proximity to the superior oblique. Once the horizontal rectus muscles have been slung, the silk sutures can be used to supraduct and infraduct the eye for greater exposure of the inferior and superior rectus muscles respectively.
- Use a Jameson muscle hook to capture a muscle. Point the tip of the muscle hook radially into the fornix, sliding it along the surface of the sclera. Once deep in the fornix, rotate the hook around so that it captures the muscle. Ensure that the muscle hasn’t been split by the hook, and that all the muscle fibres have been captured
- Angle the tip of the Jameson muscle hook away from the scleral surface, creating an opening for passage of the 2-0 black silk (or 2-0 Ethibond Excel* Polyester) suture. It is easiest to use a fenestrated (Gass) muscle hook to pass the suture in the opposite direction to which the Jameson muscle hook was passed. Alternatively, the needle can be grasped at the tip and the suture inserted “backwards”
- Tie off the silk suture near its free ends and near the muscle. To do this, place the conjunctival (Bonaccolto) forceps over then under the suture, and grasp the free ends. To tie the suture near the muscle, keep the suture loop “open” and slide it down with the open Bonaccolto forceps before tying off (Figure 11.1.3.5)
- Repeat for all four rectus muscles
Note
- When slinging the inferior and superior rectus muscles, push the muscle hook posteriorly to check that the inferior and superior oblique muscles have not been inadvertently captured, respectively. It should slide freely
- There may be less chance of capturing the superior oblique if the muscle hook approaches from the nasal side
Options
- If a fenestrated (Gass) muscle hook is unavailable, the suture can be passed underneath the muscle with the needle held backwards in a needle holder (driver)
Figure 11.1.3.4 Slinging the Superior Rectus
A: Jameson muscle hook is seen passing underneath the superior rectus from the right of the photograph. A fenestrated (Gass) muscle hook is passed underneath the same muscle in the opposite direction from the left of the photograph.
B: Passing a 2-0 silk suture underneath a rectus muscle using a fenestrated (Gass) muscle hook.
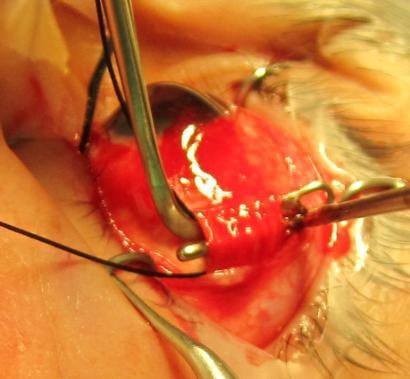
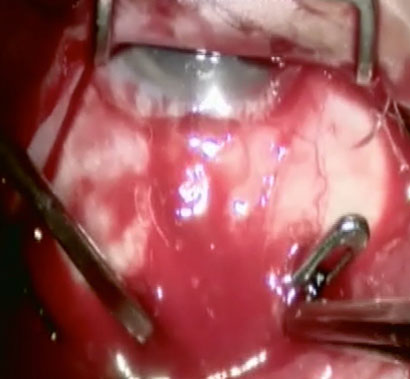
Figure 11.1.3.5 Tying the Silk Sutures
Tie the silk sutures near its free ends and near the muscle. To do this, place the forceps “over then under” the silk suture, grasping it at the free ends. Repeat for the second knot, this time advancing the loop towards the globe before tying it off.
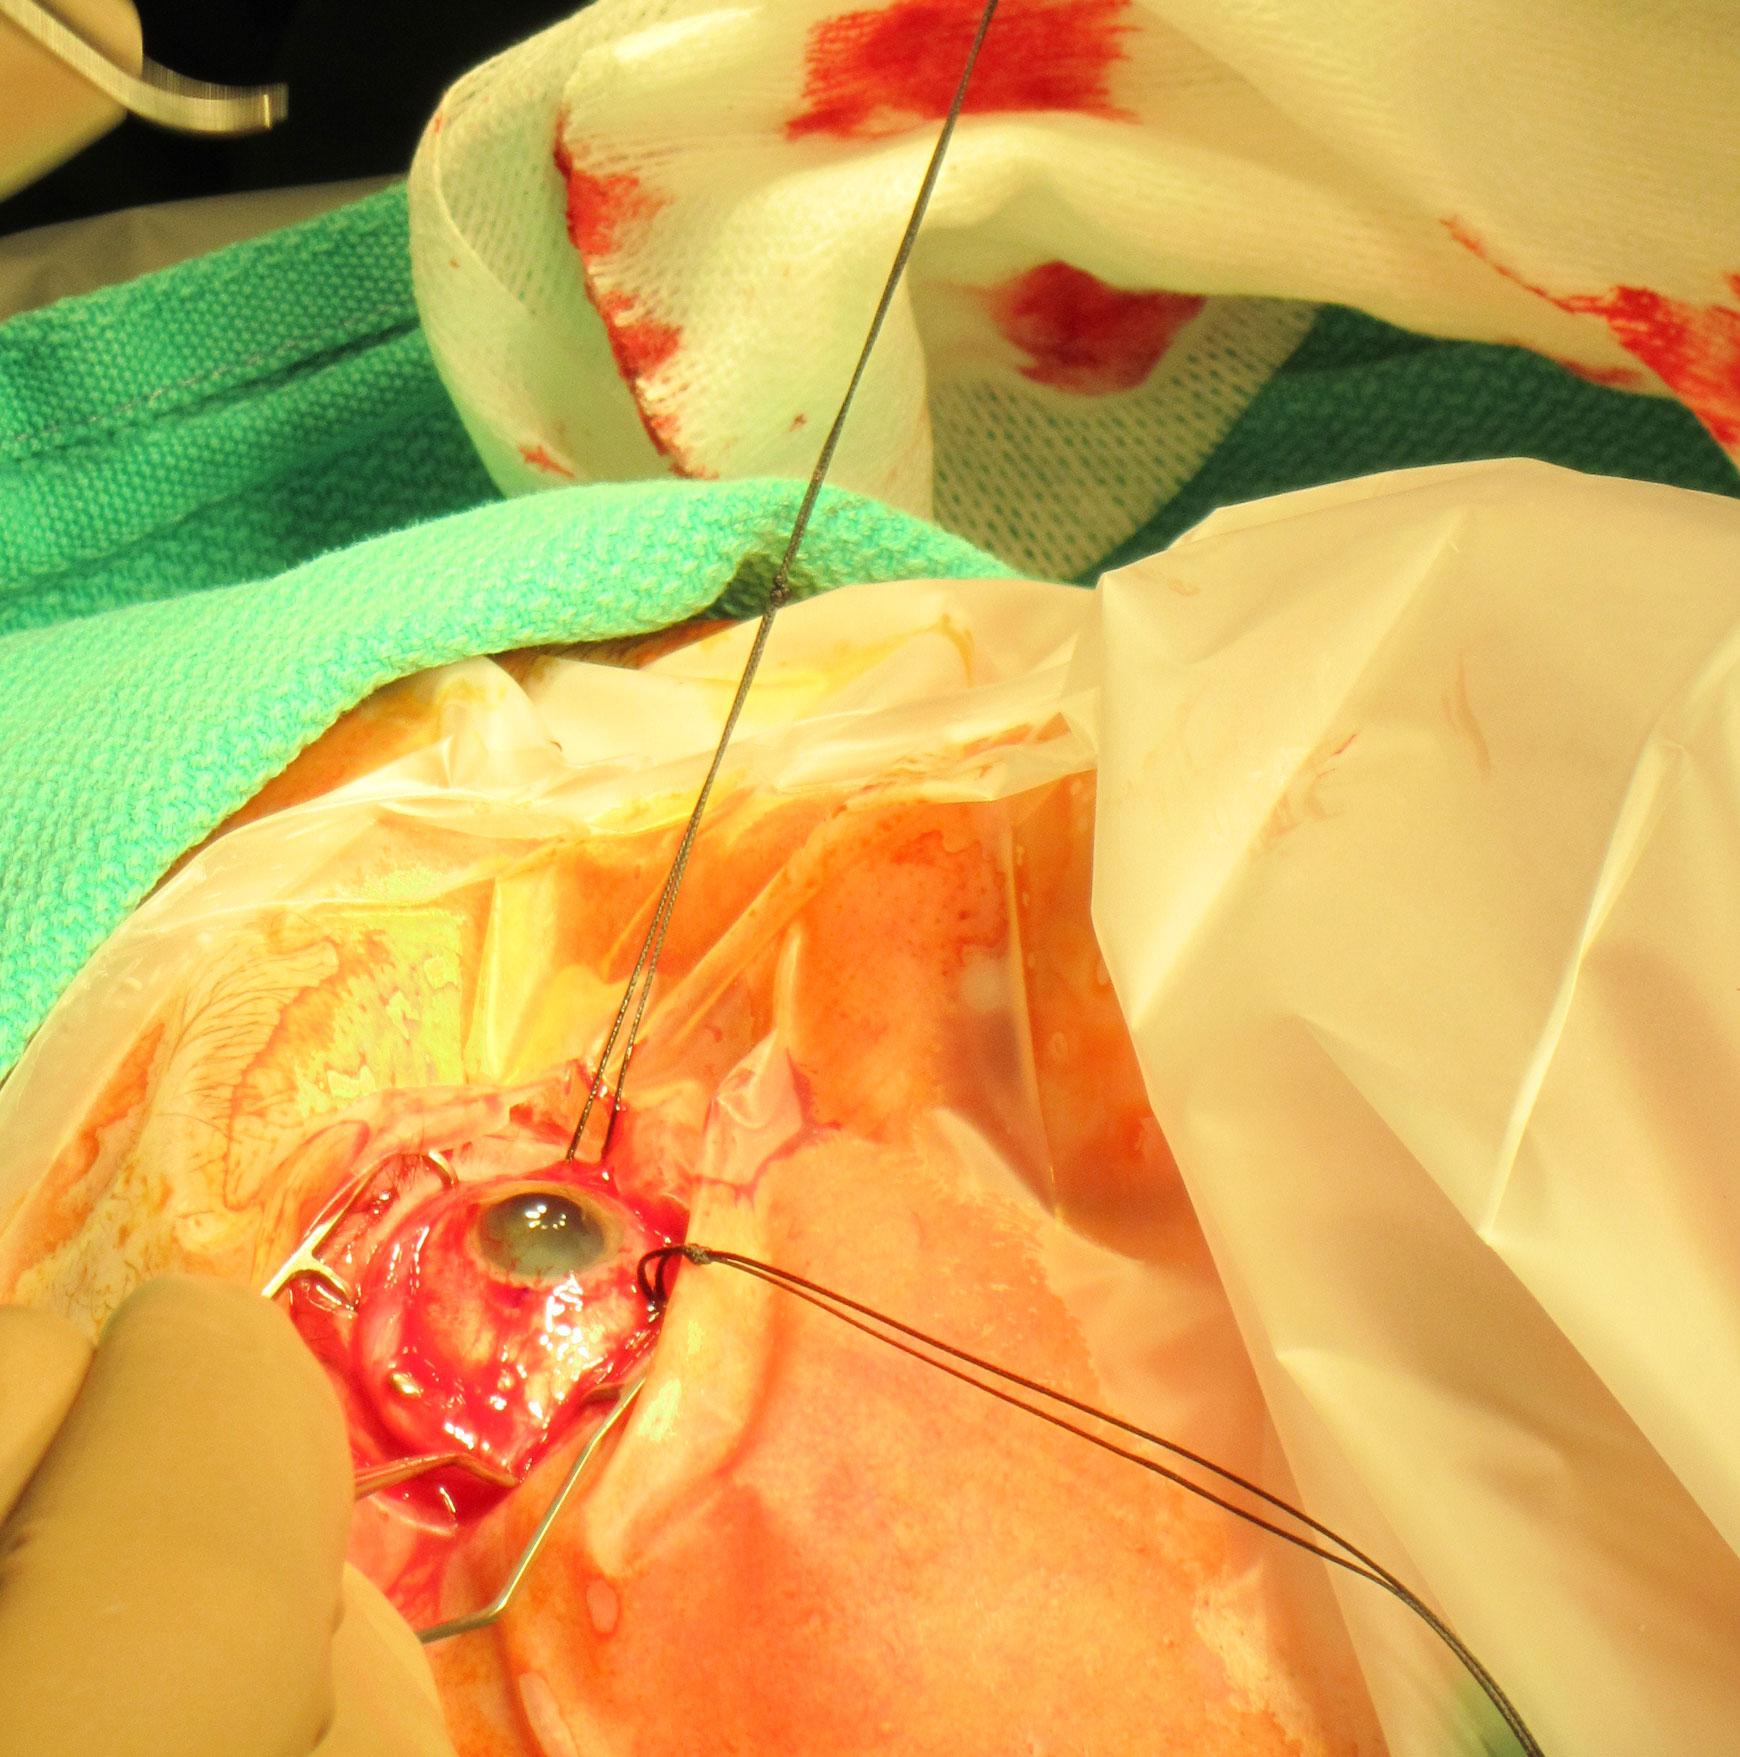

Figure 11.1.3.5 Tying the Silk Sutures
Tie the silk sutures near its free ends and near the muscle. To do this, place the forceps “over then under” the silk suture, grasping it at the free ends. Repeat for the second knot, this time advancing the loop towards the globe before tying it off.
4. Clean Tenon’s Capsule Off Each of the Rectus Muscles (Figure 11.1.3.6)
Tenon’s capsule should be thoroughly cleaned off the rectus muscles. There are three ways of doing this:
- Use conjunctival (Bonaccolto) forceps to hold up conjunctiva, then a cotton bud (q-tip) to pull Tenon’s capsule off the edge of rectus
- Use conjunctival (Bonaccolto) forceps to strip the Tenon’s capsule posterior along the muscle
- Use conjunctival (Bonaccolto) forceps to hold up conjunctiva, then Westcott scissors to cut off Tenon’s adherent to this. Remember that muscle doesn’t attach to conjunctiva. This is less traumatic than using a cotton bud (q-tip), but has the potential risk of cutting muscle if the anatomy is not identified correctly
Figure 11.1.3.6 Cleaning the rectus muscle of Tenon’s capsule with:
A: A cotton bud (q-tip)
B: Westcott scissors
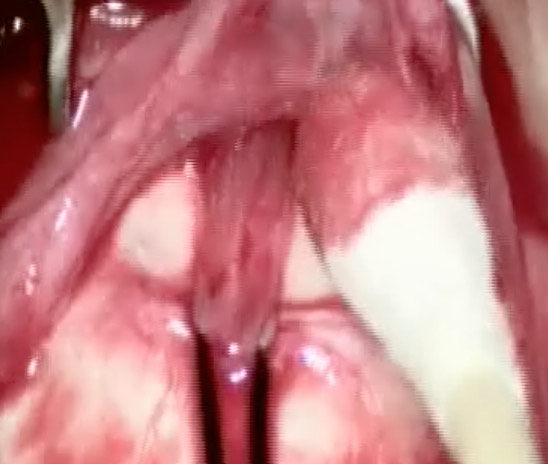

Figure 11.1.3.6 Cleaning the rectus muscle of Tenon’s capsule with:
A: A cotton bud (q-tip)
B: Westcott scissors
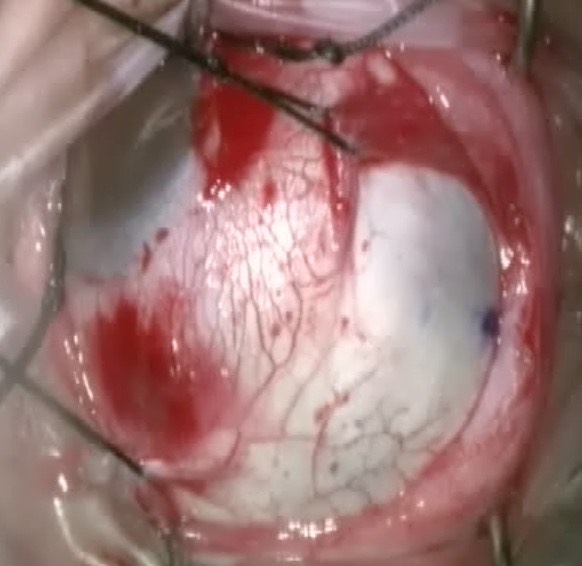
5. Inspect for Scleral Thinning (Usually Superotemporally), Staphyloma and Anomalous Vortex Veins
The presence of anatomical variations may dictate suture placement.
6. Localise the Retinal Detachment and Breaks
Localise the retinal detachment with an indirect ophthalmoscope and lens (e.g. 20D or 30D). The indirect ophthalmoscope (“hat”) is adjusted on the surgeon’s head with a double glove or sterile bag. Use a cotton bud (q-tip) or muscle hook for indentation. The assistant holds the rectus sutures radially out perpendicular to where the surgeon is looking, and maintains the cornea moist with BSS.
- Determine the extent (in clock hours) of the retinal detachment
- Mark the centre of the posterior edge of the breaks (if the break is large, the entire extent may need to be marked). Use an O’Connor localiser to mark the sclera, dry the area with a cotton bud (q-tip), then re-mark with a fine point permanent marking pen. The mark can be re-checked with the O’Connor localiser or wooden end of a cotton bud (Figure 11.1.3.7)
7. ± Cryotherapy
Apply cryotherapy to each of the breaks. Attempt to re-appose the retina to the retinal pigment epithelium with scleral indentation during cryotherapy. Aim for the edges of each break, ensuring that the “horns” are covered. In a retinal dialysis, only the anterior edge (where the retina has detached from the ora serrata) requires cryotherapy. Stop the cryotherapy each time the freezing becomes visible within the retina, and wait several seconds for the ice to thaw before moving the probe. Aggressive cryotherapy in the centre of the break should be avoided, as it will excessively liberate retinal pigment epithelial cells into the vitreous, which may increase the risk of proliferative vitreoretinopathy (PVR).
All rights reserved. No part of this publication which includes all images and diagrams may be reproduced, distributed, or transmitted in any form or by any means, including photocopying, recording, or other electronic or mechanical methods, without the prior written permission of the authors, except in the case of brief quotations embodied in critical reviews and certain other noncommercial uses permitted by copyright law.

Westmead Eye Manual
This invaluable open-source textbook for eye care professionals summarises the steps ophthalmologists need to perform when examining a patient.